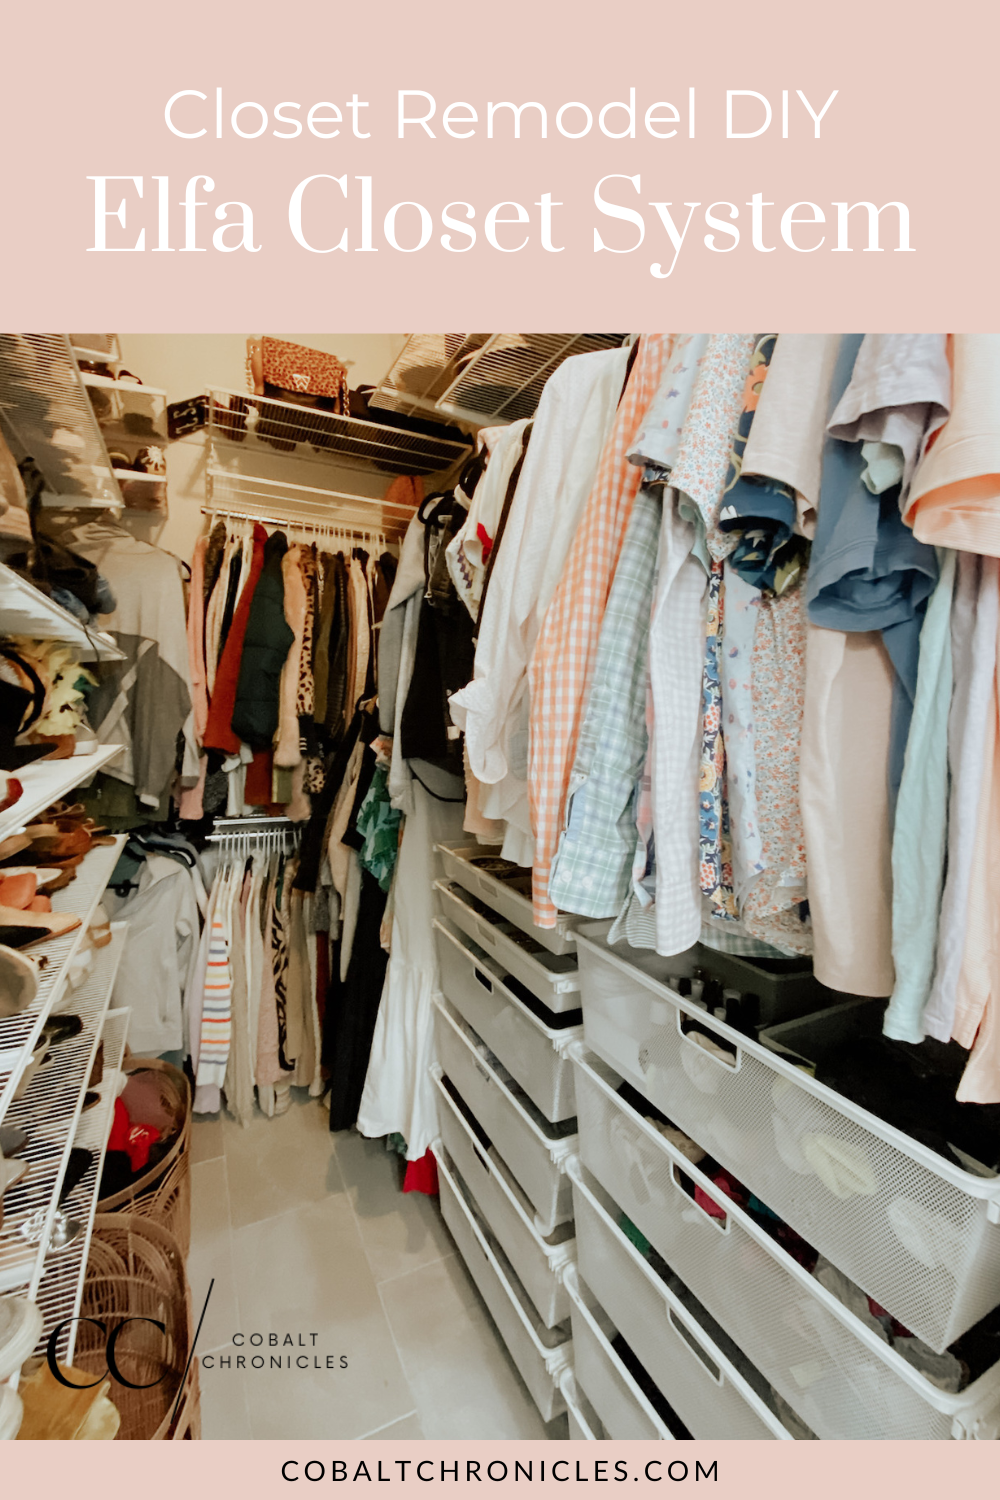
This post may contain affiliate links.
I’m so excited to share today’s post with you! Michael and I bought our first home this summer. We were thrilled to make a few changes prior to our move-in date. We had the entire house painted with a fresh coat of Sherwin-Williams Greek Villa and had two small closets in the primary bedroom combined to make one large walk-in closet. In today’s post, I’m sharing how we ultimately settled on outfitting the new walk-in closet with The Container Store Elfa closet system and the Elfa closet system installation process.
The Back Story
But first, let’s backtrack a bit … Our primary bedroom originally had two standard reach-in closets that backed up to one another. The design was really silly, and honestly didn’t seem thought through at all by the original builder. Not only were the closets small, but with the placement of the closets, there were so many doors – all hitting each other.
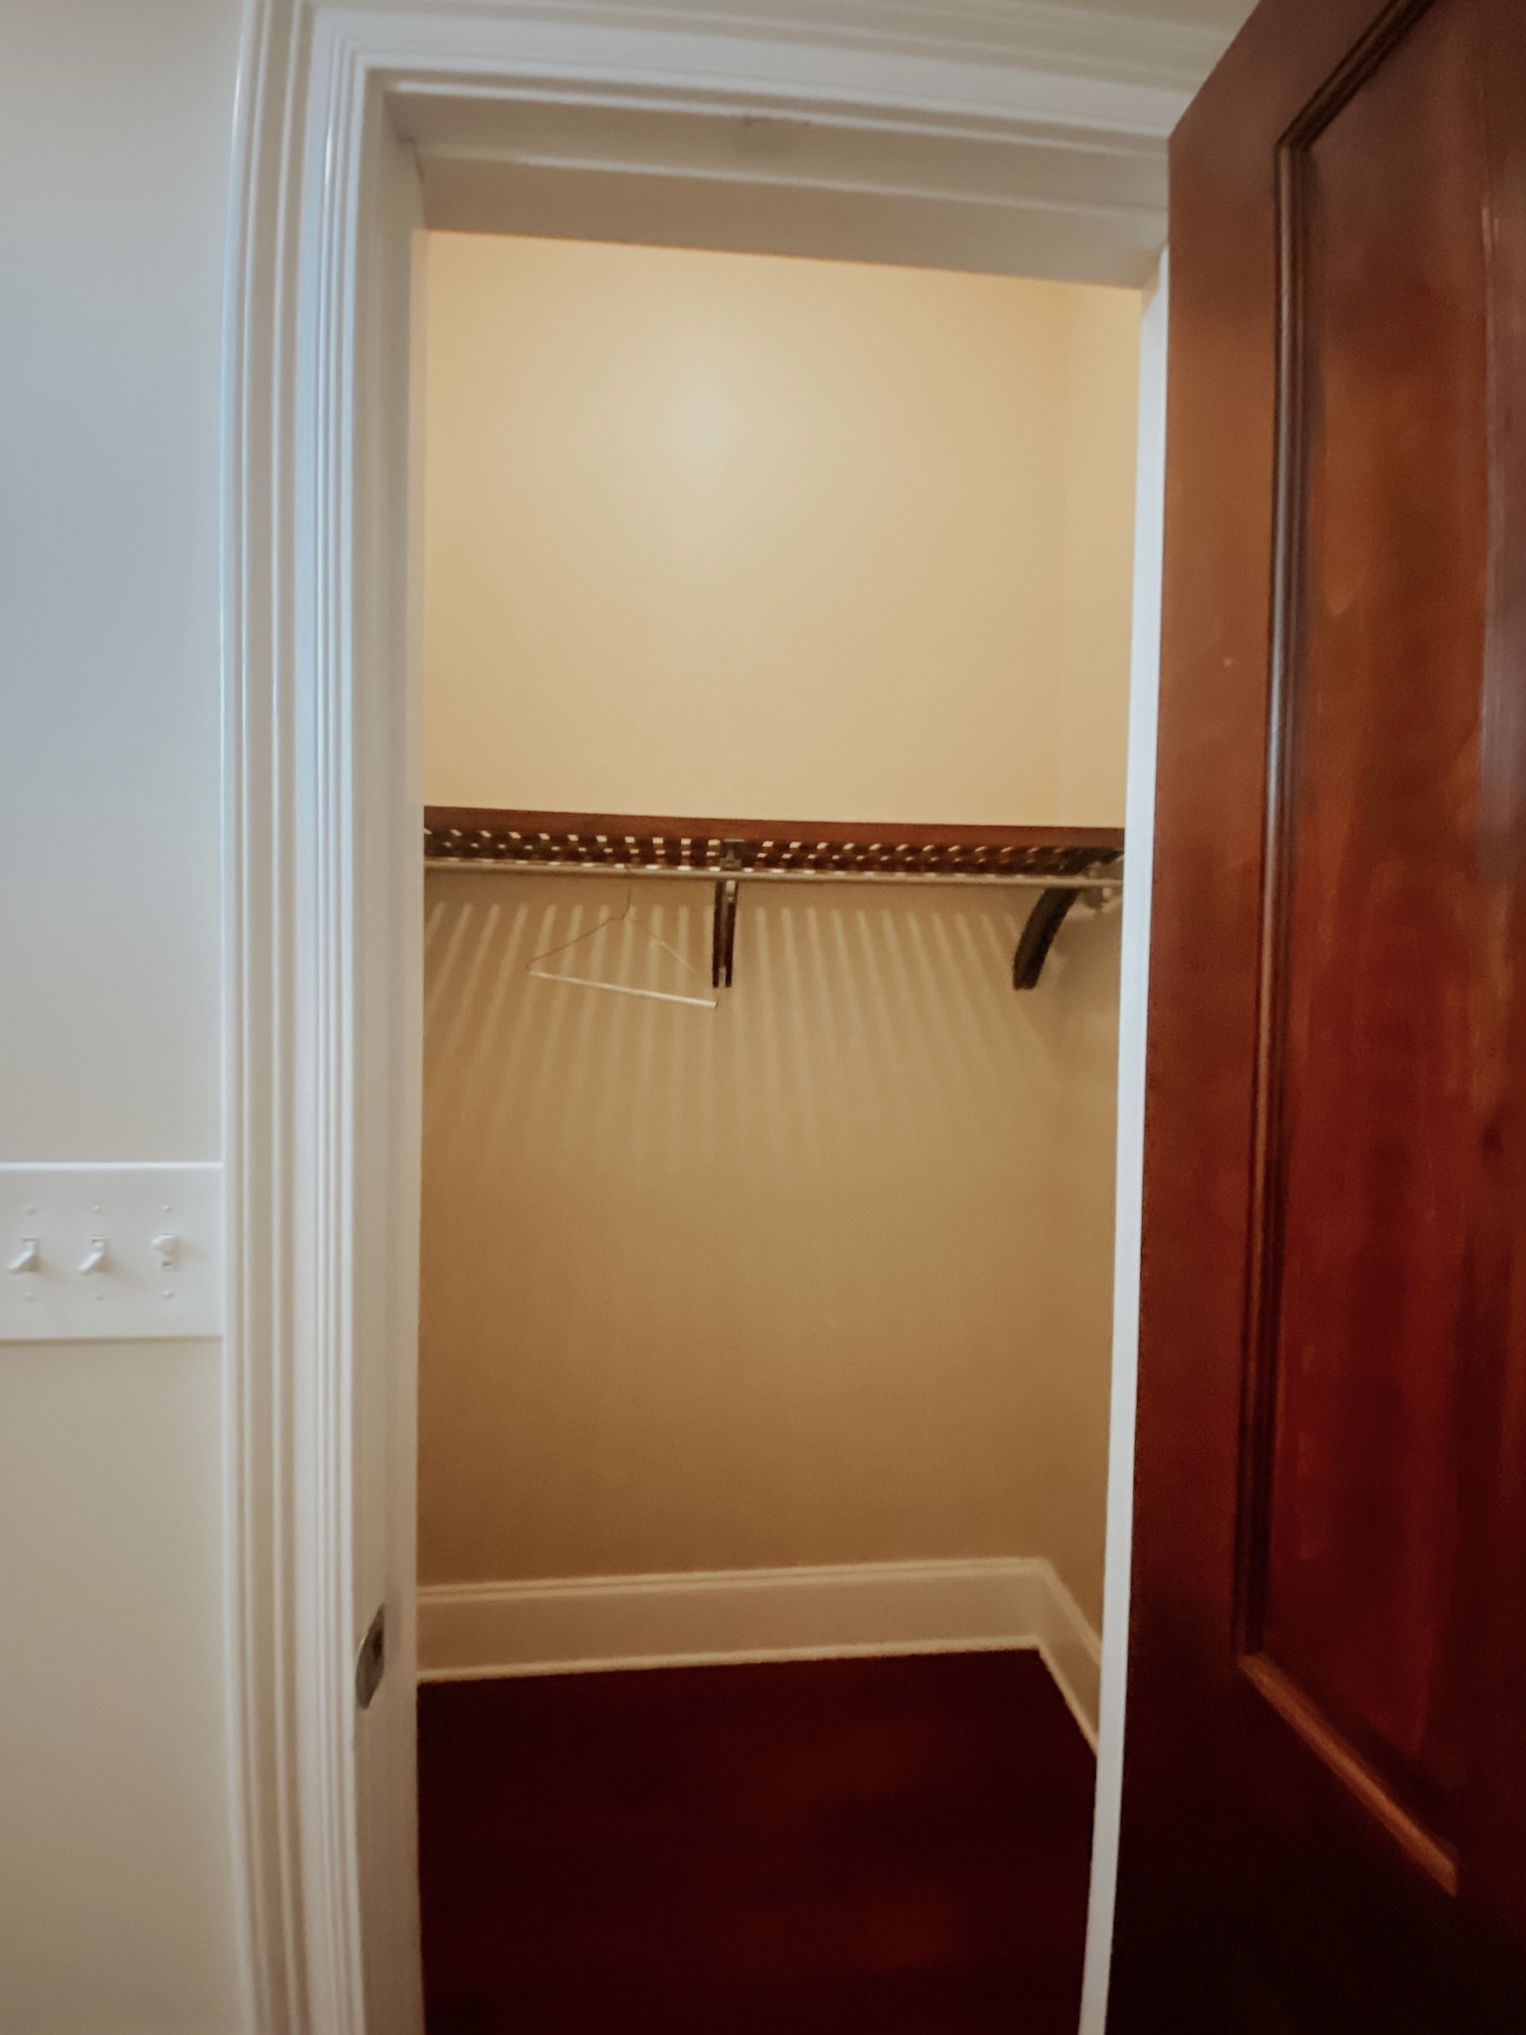
One of the original reach-in closets in our primary bedroom.
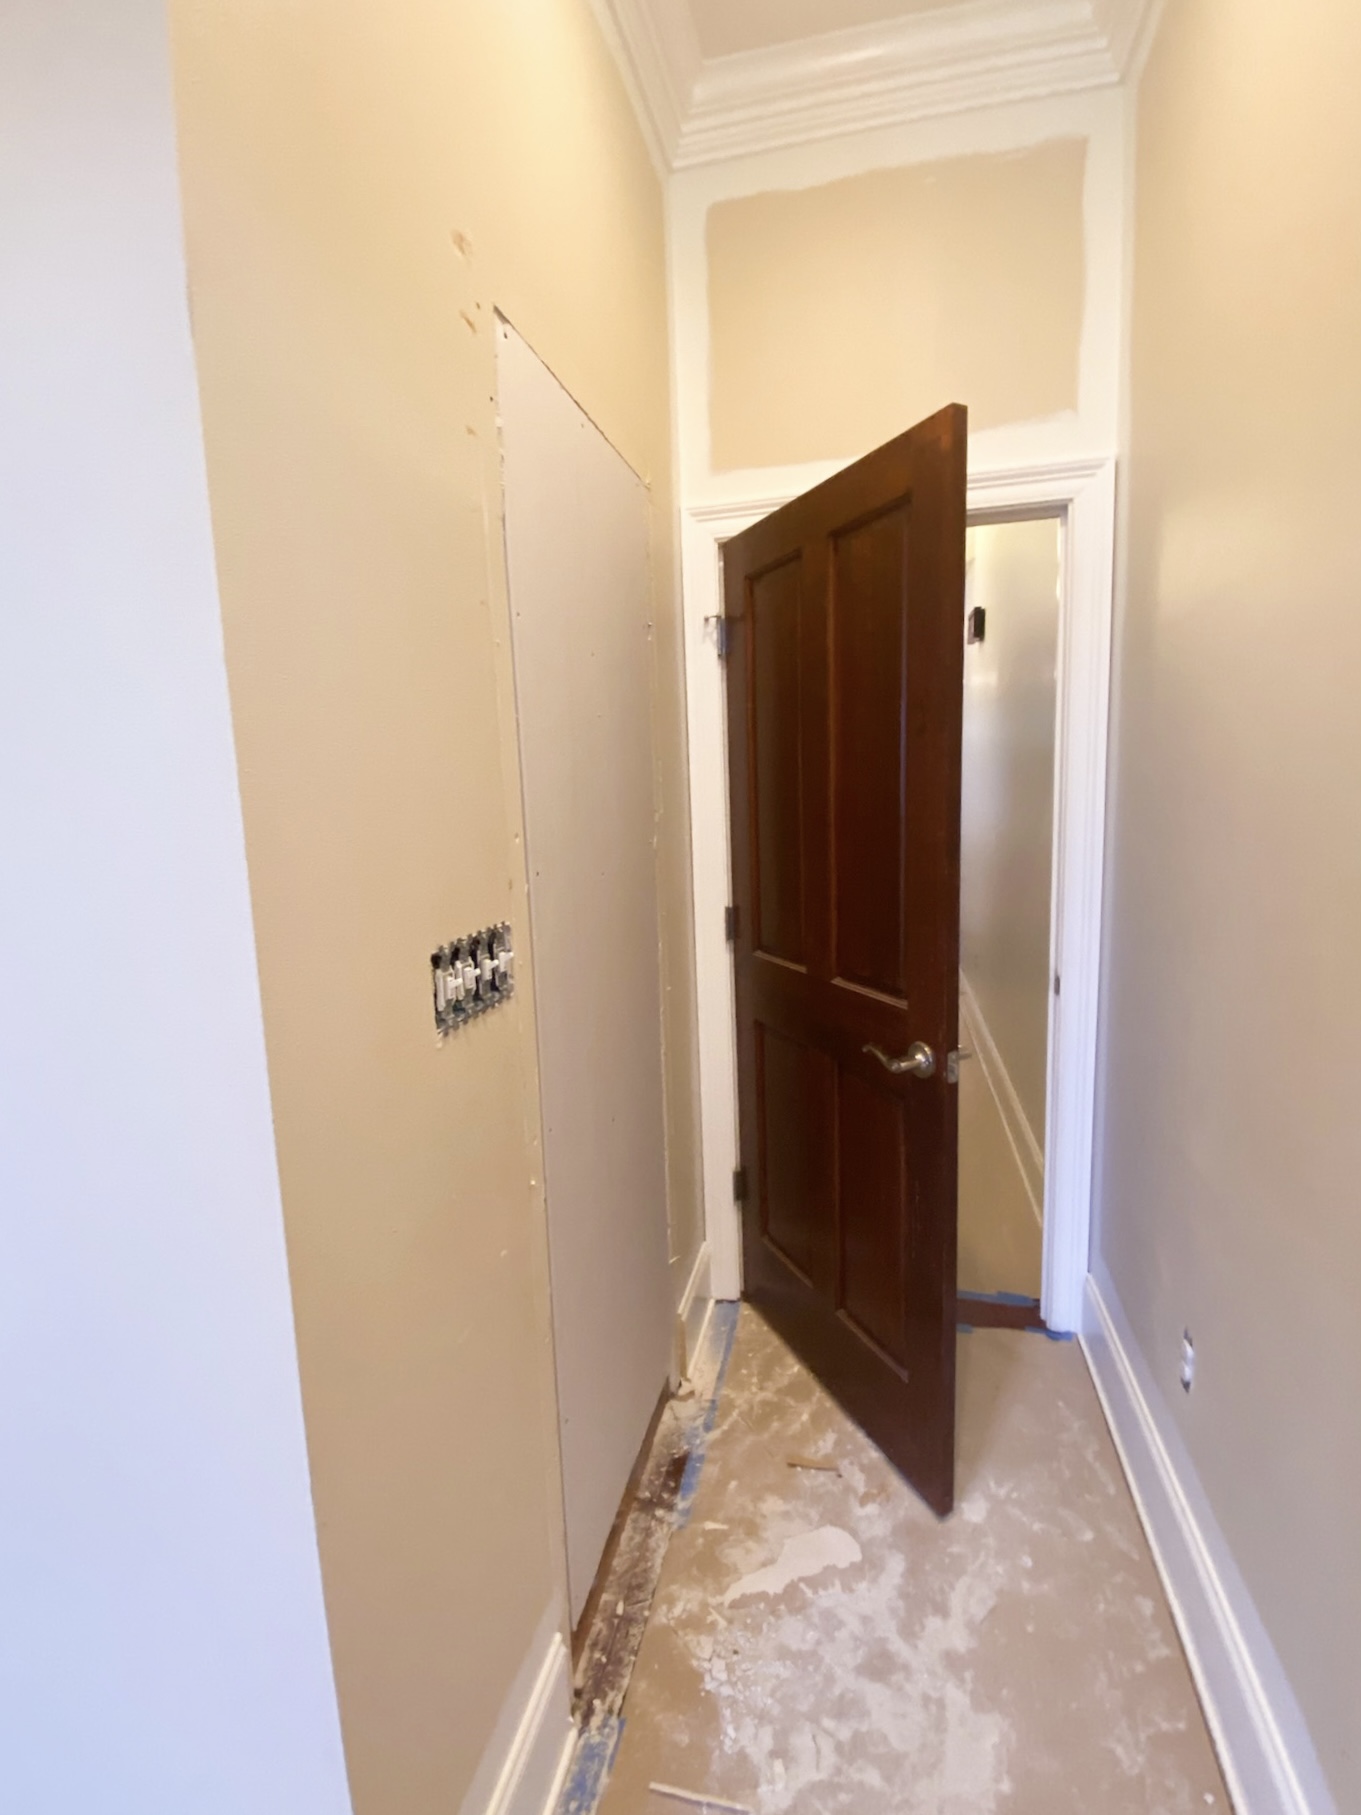
During construction. Closing off the entrance of the first reach-in closet in the primary bedroom.
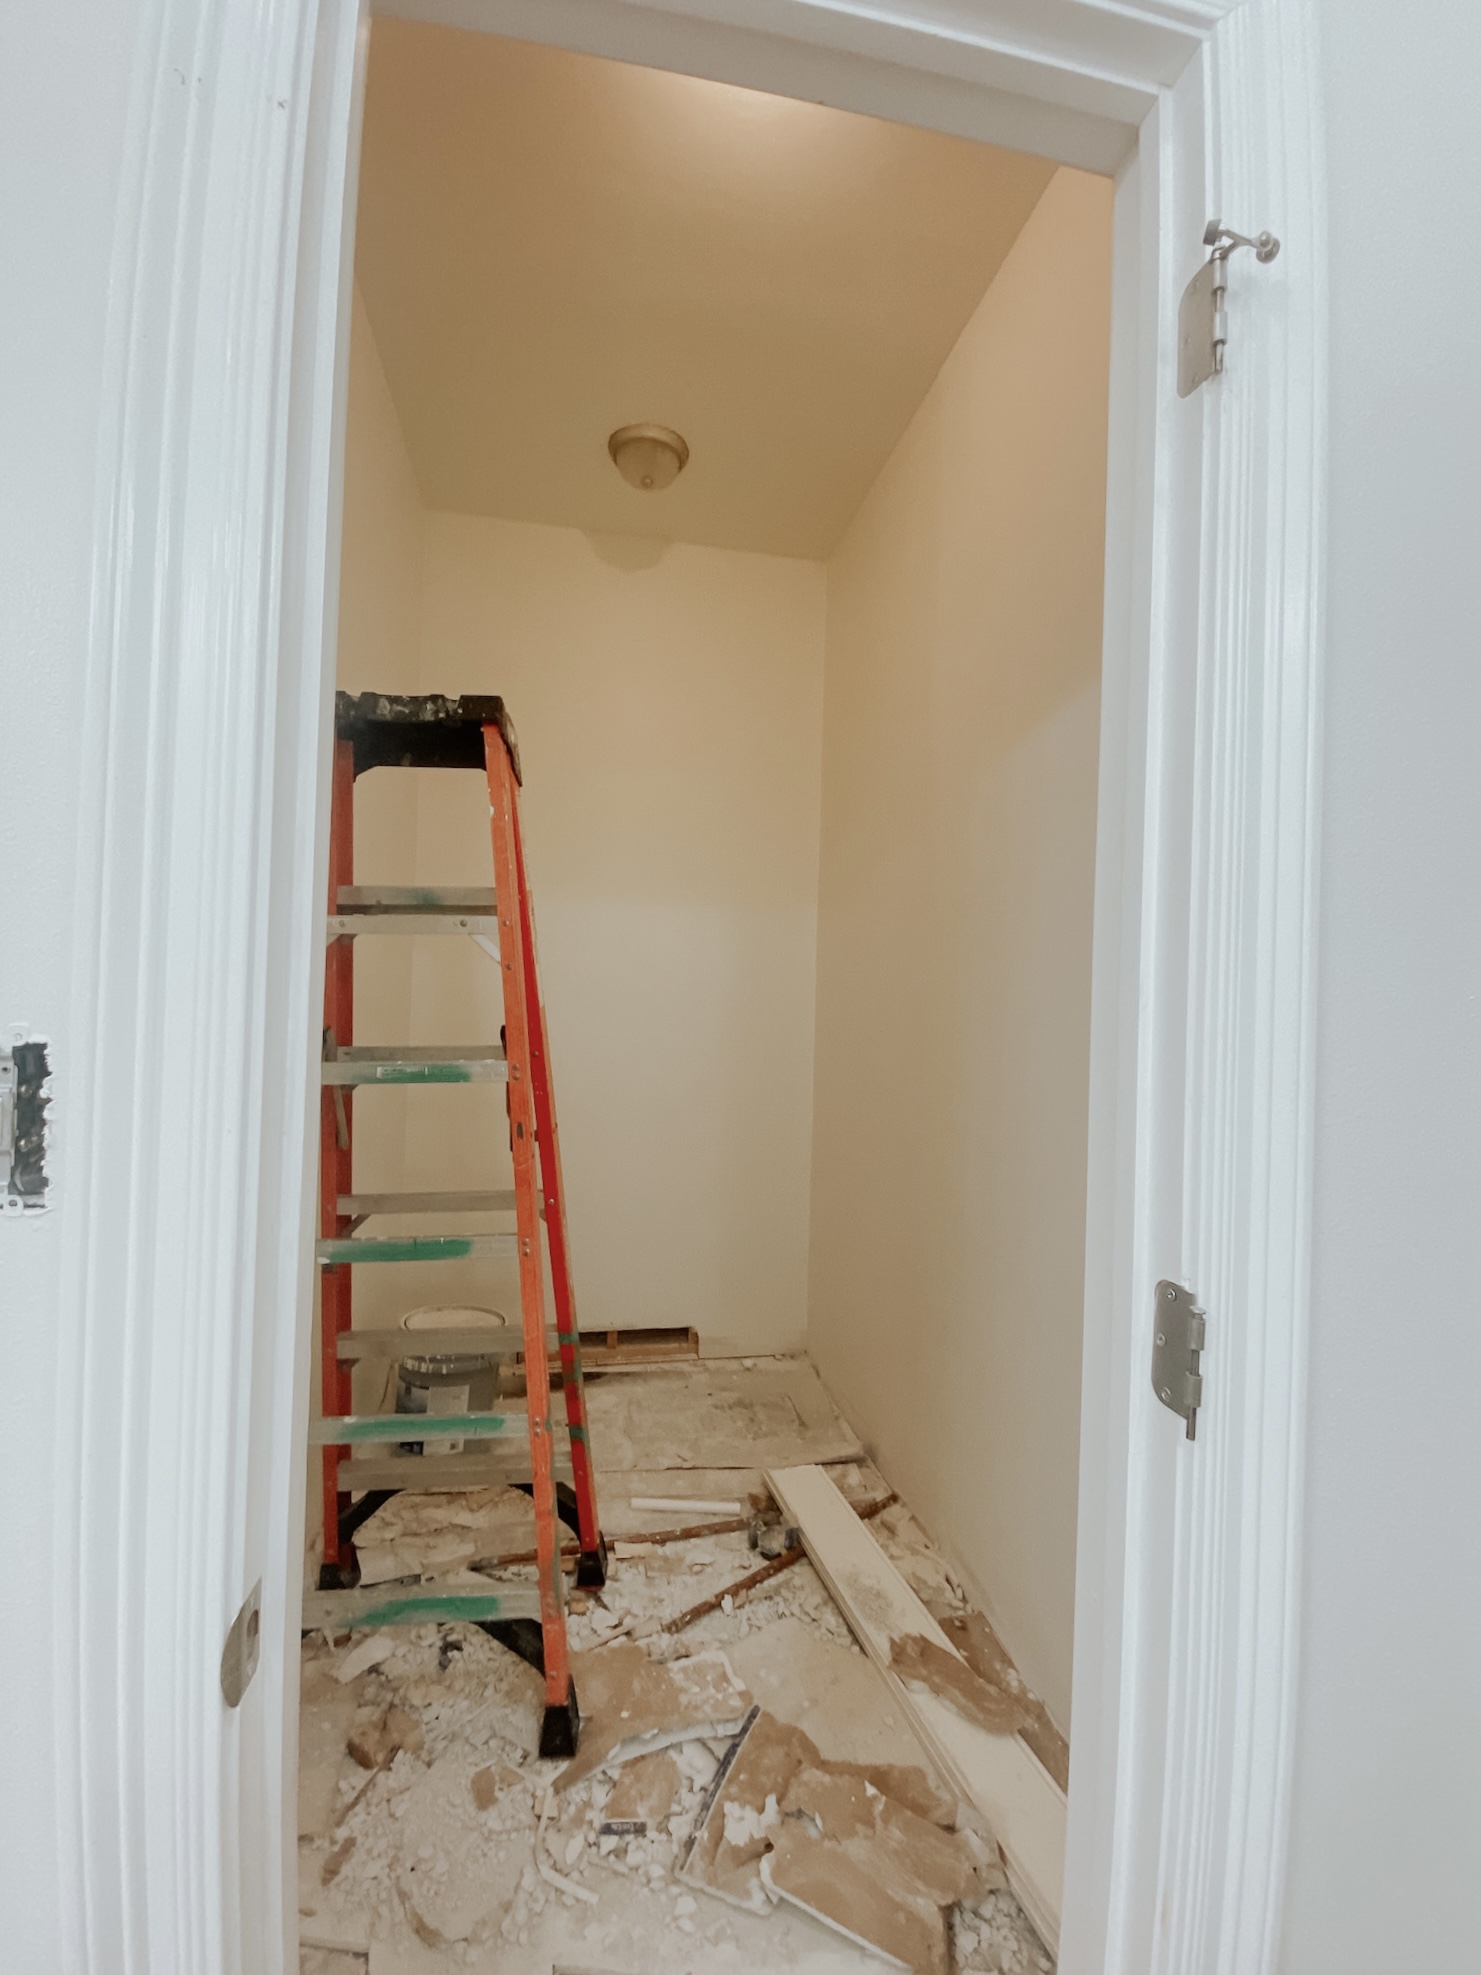
The closets backed up to one another. Our contractor removed the wall in between the closets and finished out the closet to make one large walk-in closet in our bedroom.
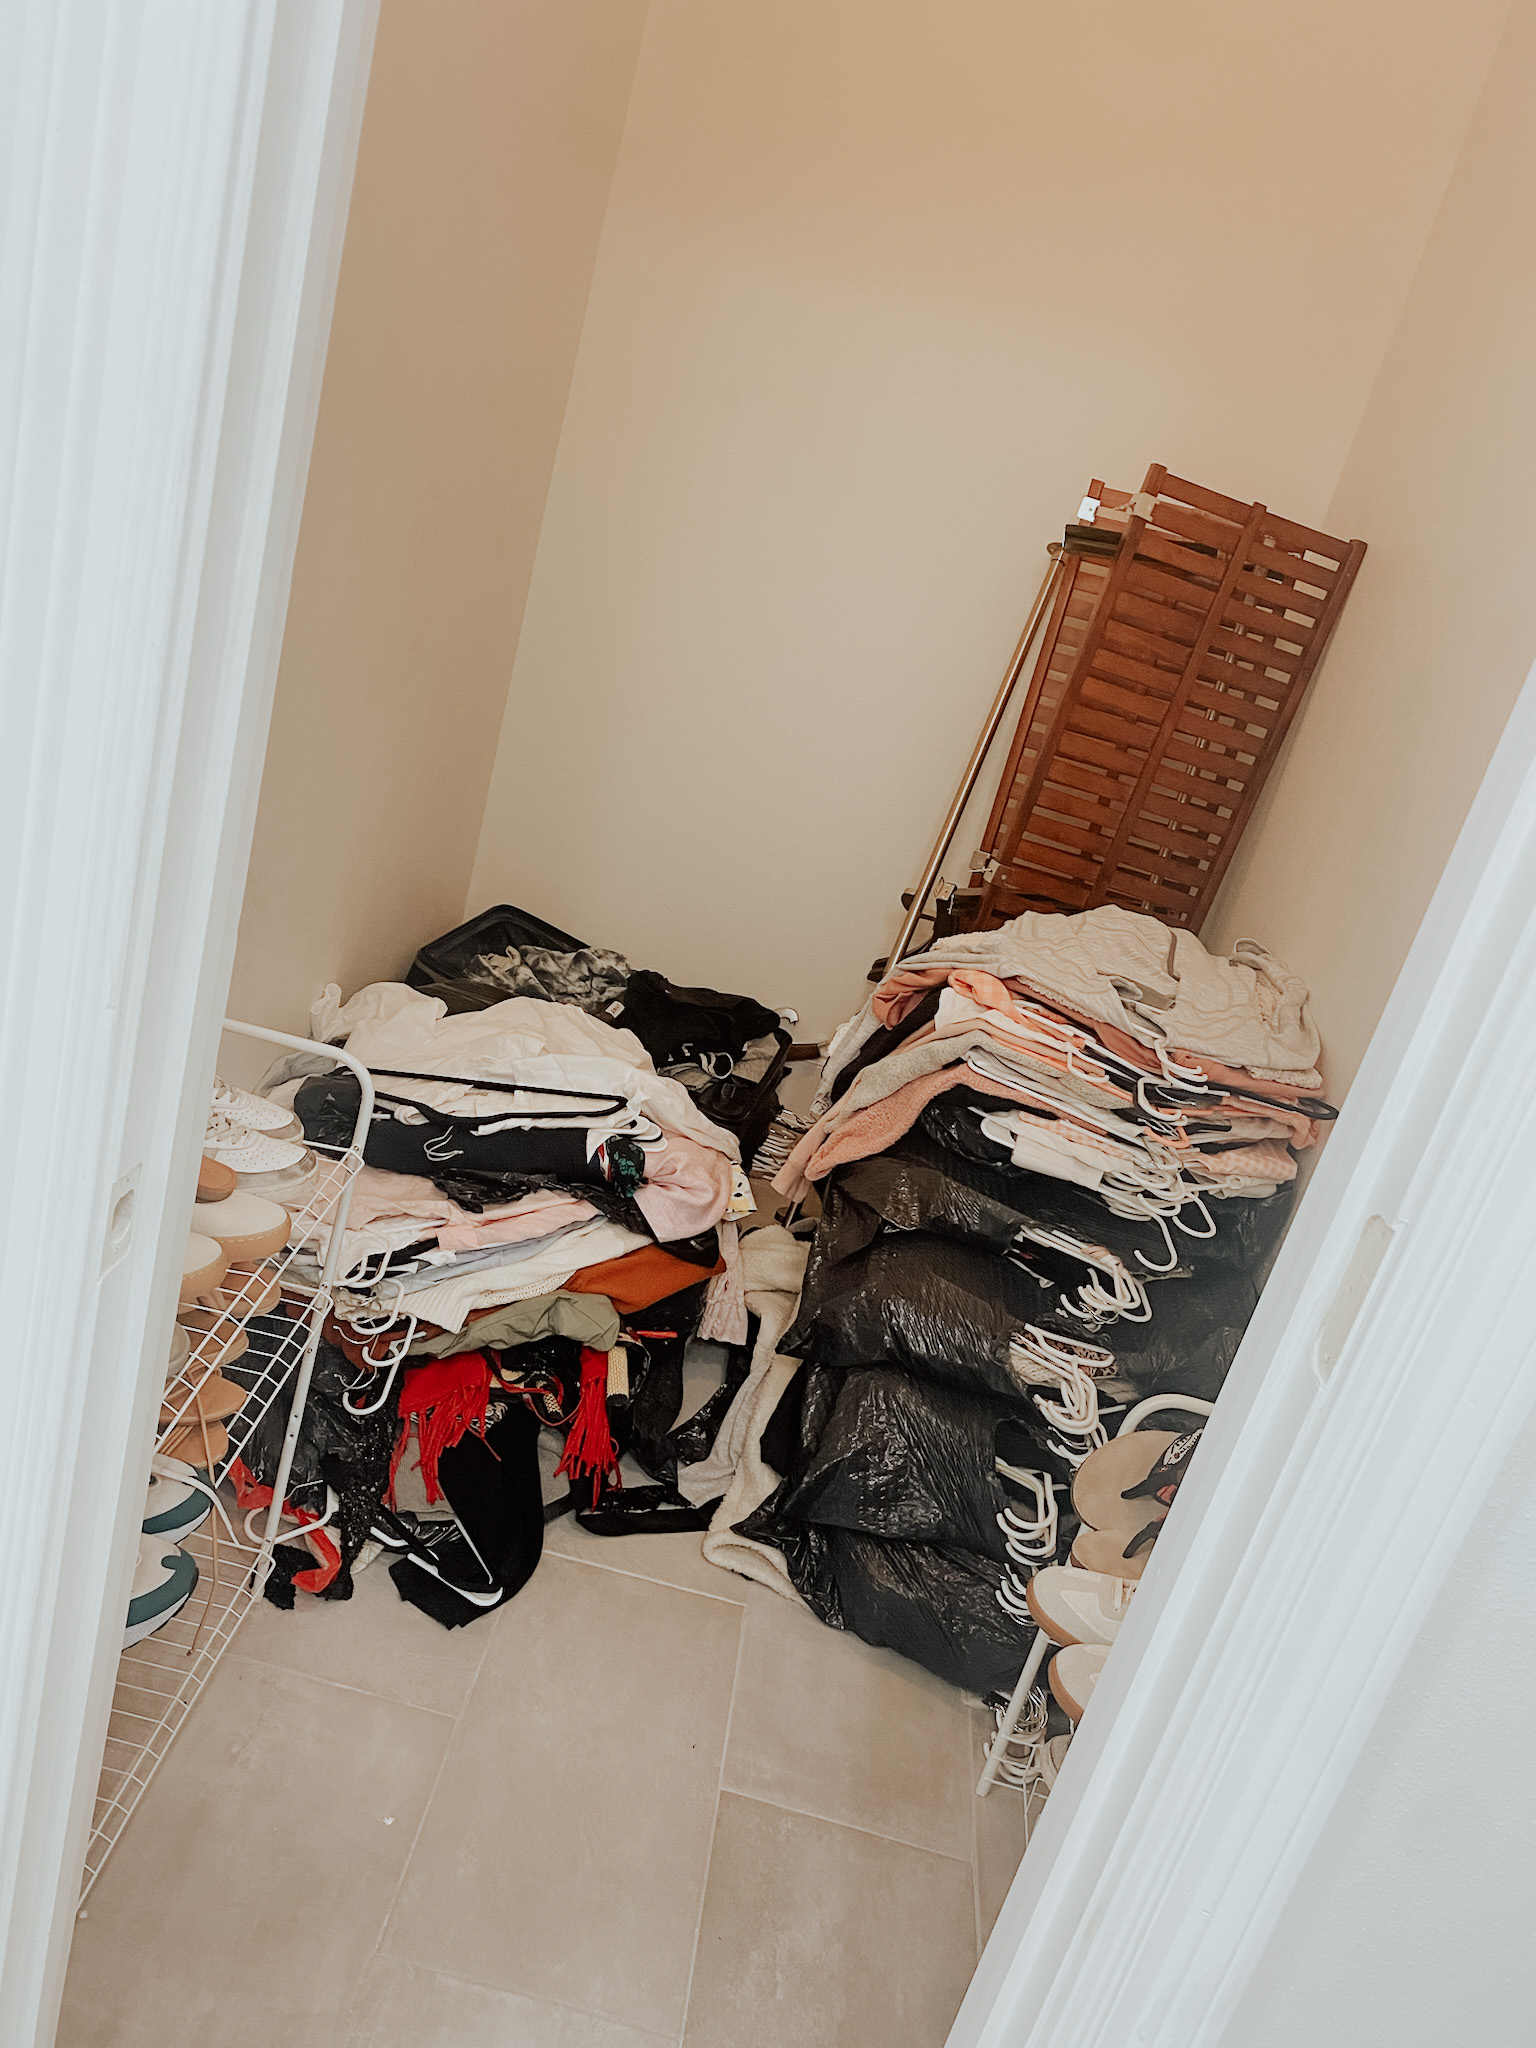
Yikes. The state of our closet while I was gathering quotes for different closet install systems.
After the construction was complete, we were left with a large empty space to outfit with a closet system. I had three different companies come to our house to measure and provide a price quote. The estimates were expensive (!!) – around $5,000. I decided to do some digging into DIY options. The Container Store and IKEA seemed to be the top two most recommended brands for different closet systems. At first, I actually decided to go with the IKEA Pax closet system simply based on the fact that I personally knew more people who’d installed this system in their own homes. But when I started the online design process, I quickly realized that hardly any of the parts were in stock at IKEA. A blessing in disguise! At that point, I switched to The Container Store and ended up settling on the Elfa closet system.
The Container Store has several different custom closet systems to choose from, the Elfa closet system is the most cost effective. It’s their baseline custom closet system.
Elfa Closet System Design
One thing to know upfront about the Elfa closet system custom design is that you can’t really design it yourself online (even though The Container Store does have an online tool to get you started). You’ll need to assistance of one of The Container Store’s Custom Closet Experts (free of charge!). As a first step, you’ll need to measure your space. The Closet Expert will help you do this if you’re not sure what to measure (in my case, I didn’t realize I was supposed to start measuring the height of my walls by starting above the baseboard – we have very tall baseboards in our closest). The Custom Closet Experts were EXTREMELY helpful during the entire design and install process! I was thoroughly impressed by this service!
I spoke to the Experts on multiple occasions throughout the design and install process. They helped me figure out the amount of shelves, hanging space (double hang/long hang), and drawer space that I needed and could fit in the new walk-in closet. They also helped me stay within my budget. I called back several times and asked for them to help me remove pieces from the design that weren’t really necessary and were more aesthetic than functional – the costs add up! I was very impressed with the amount of assistance by the Experts during the design process.
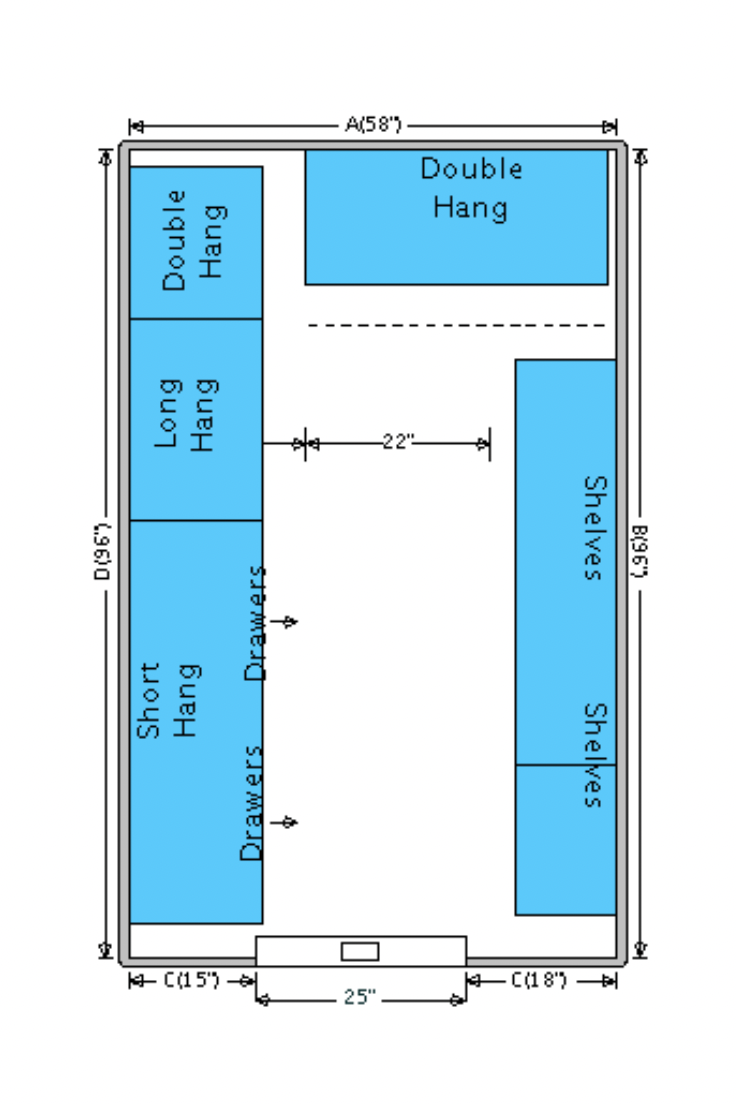
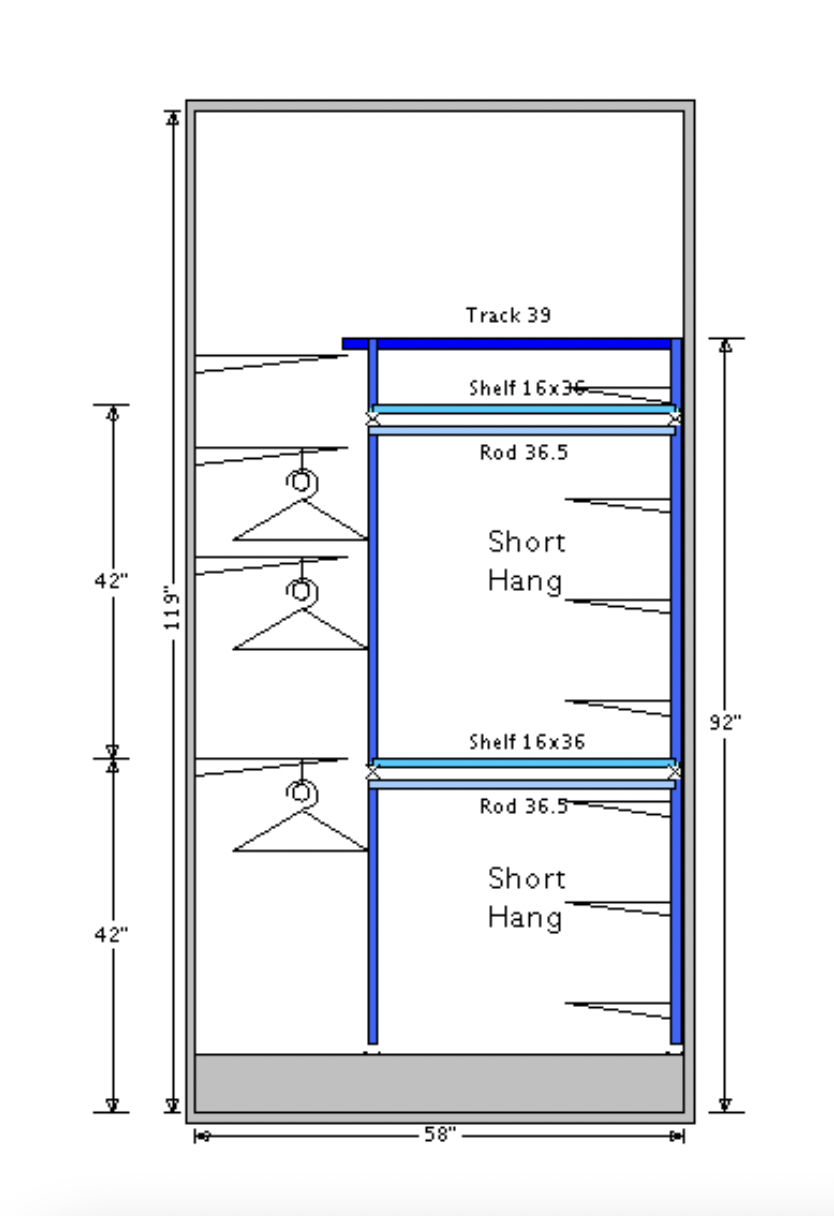
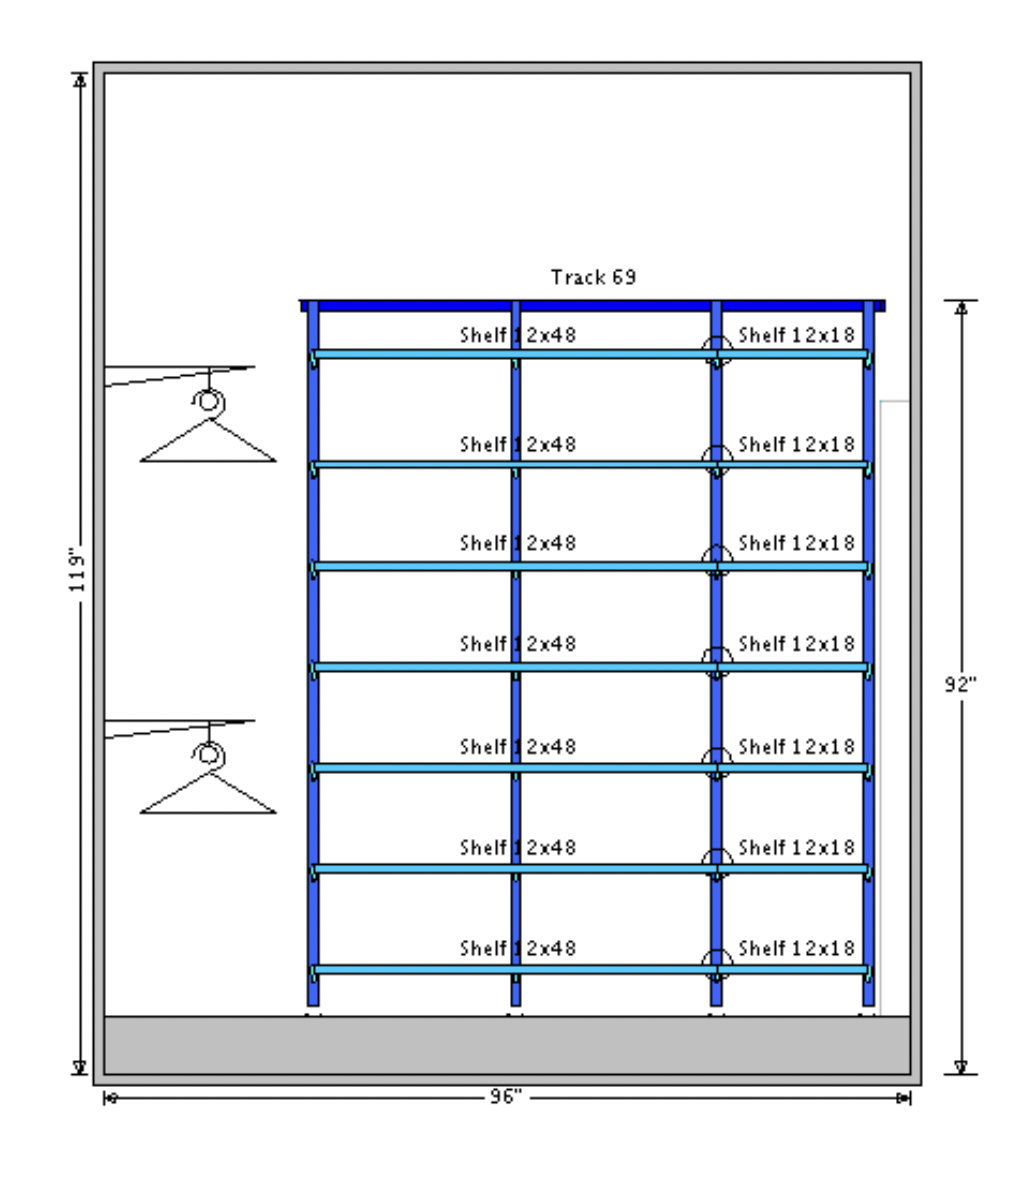
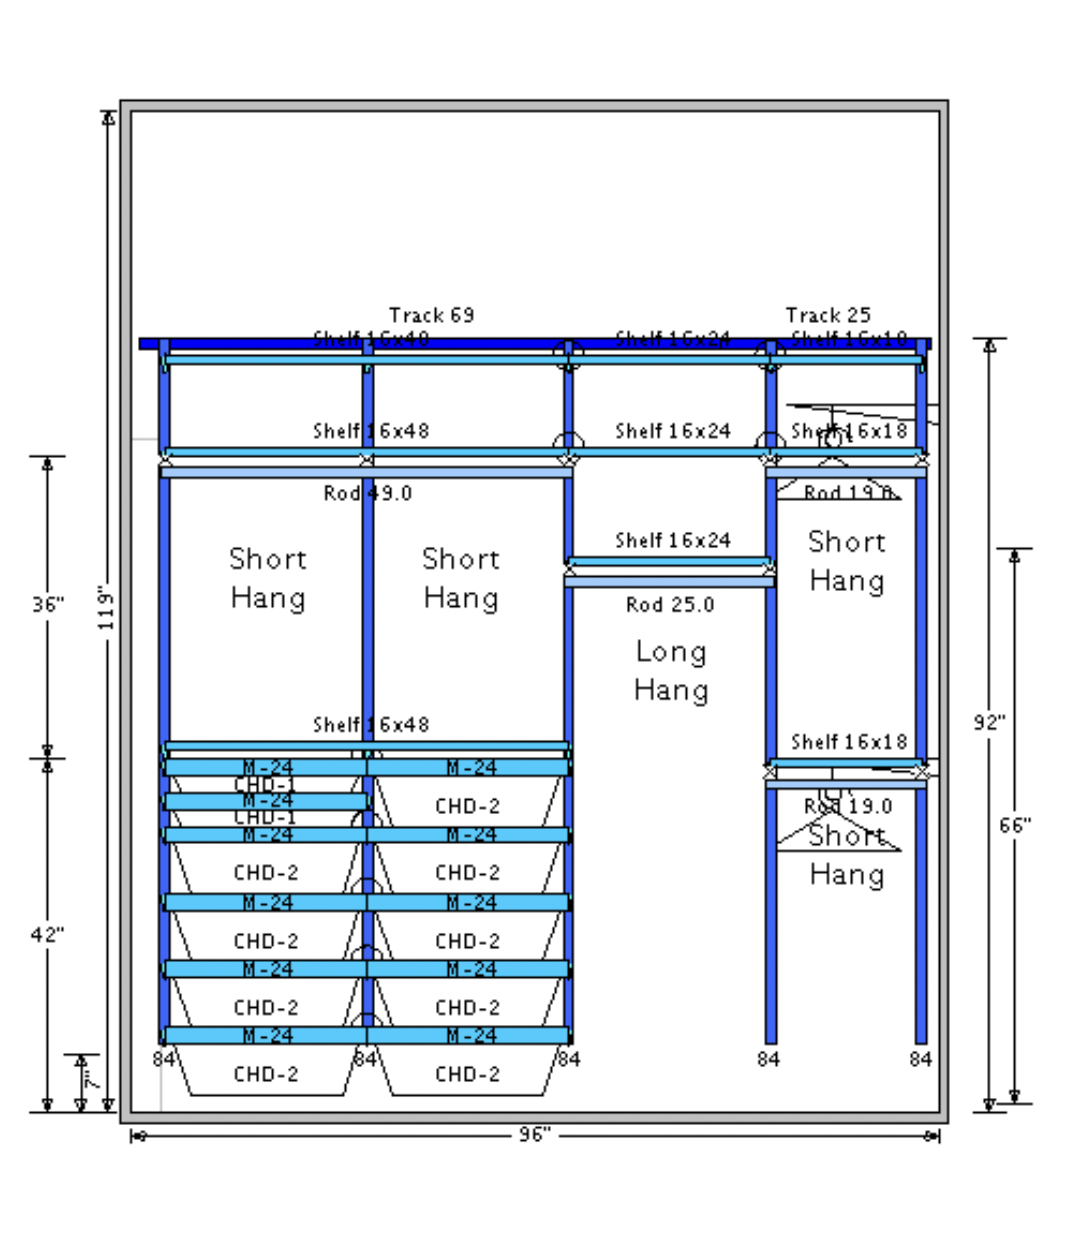
My Elfa Closet Design
Elfa Closet System Ordering & Inventory
Once you’re happy with your design, you can place your order all at once. The Container Store automatically adds all of the necessary pieces and hardware needed for your design to your online cart. So easy! Every single item in my design was in stock and shipped quickly.
As a heads up, the pieces are shipped separately and arrive in tons of different boxes. You’ll definitely want to be home to collect all the packages. Ours arrived over the span of a week. Don’t be intimidated by the number of boxes!
Michael and I decided to tackle the Elfa closet system install over the course of a week. We dedicated an hour or so each night after Weldon went to sleep. The first night was inventory night. We unboxed all of the pieces, and I cross checked the items with the install instructions (you can print the install instructions for your design from your Container Store account) to ensure we had all of the necessary pieces.
Three drawers and one shelf were damaged during shipping. I called the Closet Design Experts the next day and they shipped out replacement items right away, free of charge. Again, I can’t rave enough about the customer service experience!
Tools I Used Not Included In My Order
While The Container Store provides all of the pieces and hardware you need for your closet, there are a few tools you’ll need to install the Elfa closet system. What you’ll need: a hand drill, drill bit set, hammer, measuring tape, level, pencil, and step ladder.
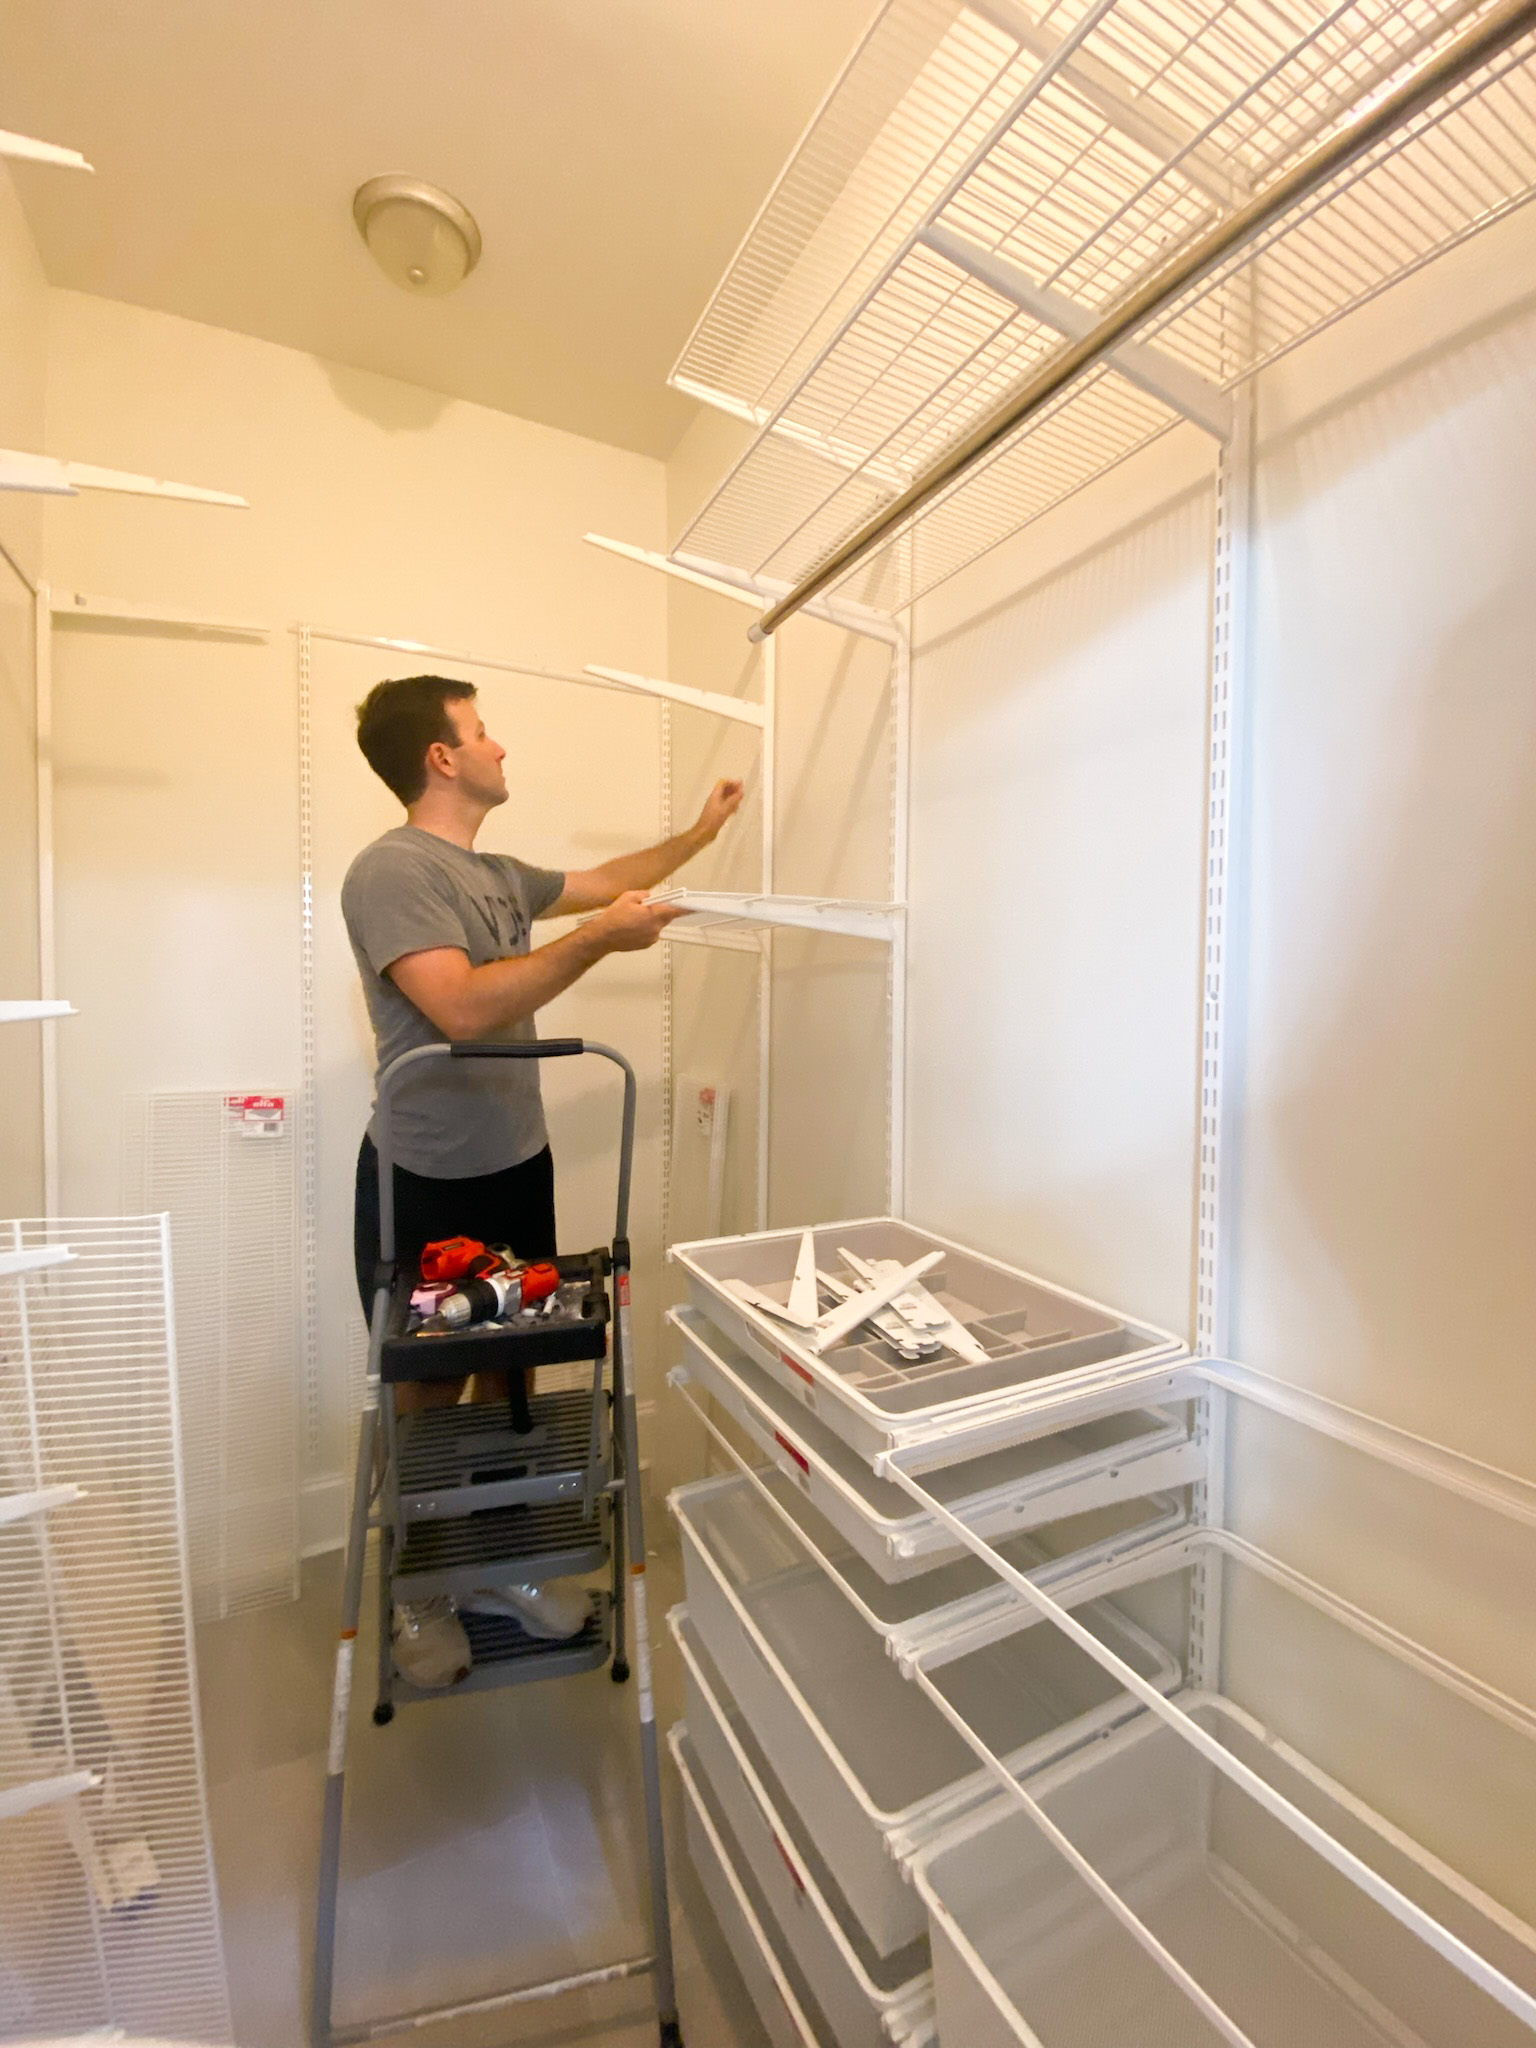
Elfa Closet System Install: Top Horizontal Tracks
I’m not including all of the detailed steps in the installation process in this post (you can reference your install instructions and Google/YouTube as needed). Rather, I wanted to include an overview with tips and tricks we learned throughout the process to hopefully make your install process a little easier!
The first steps in the installation process are the MOST important. The Elfa closet system essentially hangs from the top horizontal tracks that are screwed and secured into your walls. These tracks are actually the only items you have to screw into the wall, which is a major pro of this system! Michael and I learned a few things while installing these tracks, which would have been so helpful to know beforehand. While the Closet Experts provide excellent advice and tips over the phone, The Container Store’s actual installation instructions are pretty minimal and not great. I’ll spare you on how we learned the hard way and simply share how to install the top track securely into the wall.
After measuring out the positioning of your tracks by following along with your design and marking the holes where you’ll secure the track to the wall, you’ll want to start by using a 1/8 inch drill bit at each marker. This is a tiny drill bit. It will drill a narrow hole – a “starter” hole, for lack of a better phrase.
Tip: I ordered this large level from Amazon for this project. It came in really handy for leveling the tracks prior to drilling.
** If the 1/8 drill bit does not go all the way into the wall, you’ve likely hit a stud.** This is important! Mark the holes where you believe you’ve hit a stud. For the stud spots, you’ll use wood screws instead of anchors to secure the track to the wall.
Next, you’ll want to use a bigger drill bit to make the hole for your anchors – SKIP THIS STEP for all of the drill spots you marked as hitting a stud. For those spots, you will not use an anchor, instead, you’ll simply use a wood screw to secure the track to the wall. For the holes that require an anchor, we had to kind of guess at the size of the drill bit to use to make the hole big enough to fit the anchor. Start out small and test the anchor to see if it’ll go in. If it won’t, then size up to the next drill bit size until the anchor seems like it will fit. **You don’t want the hole too big to where the anchor simply slides in. You need a little resistance, you’ll use a hammer to insert the anchor itself into the wall.**
Next, you’ll place the track on the wall and either use the wood screws to drill directly into the studs or use the screws that come with the anchors to screw the anchors into the wall. After you successfully secure the top horizontal tracks to the wall, you’re 75% of the way done! These tracks are by far the hardest part of the installation process.
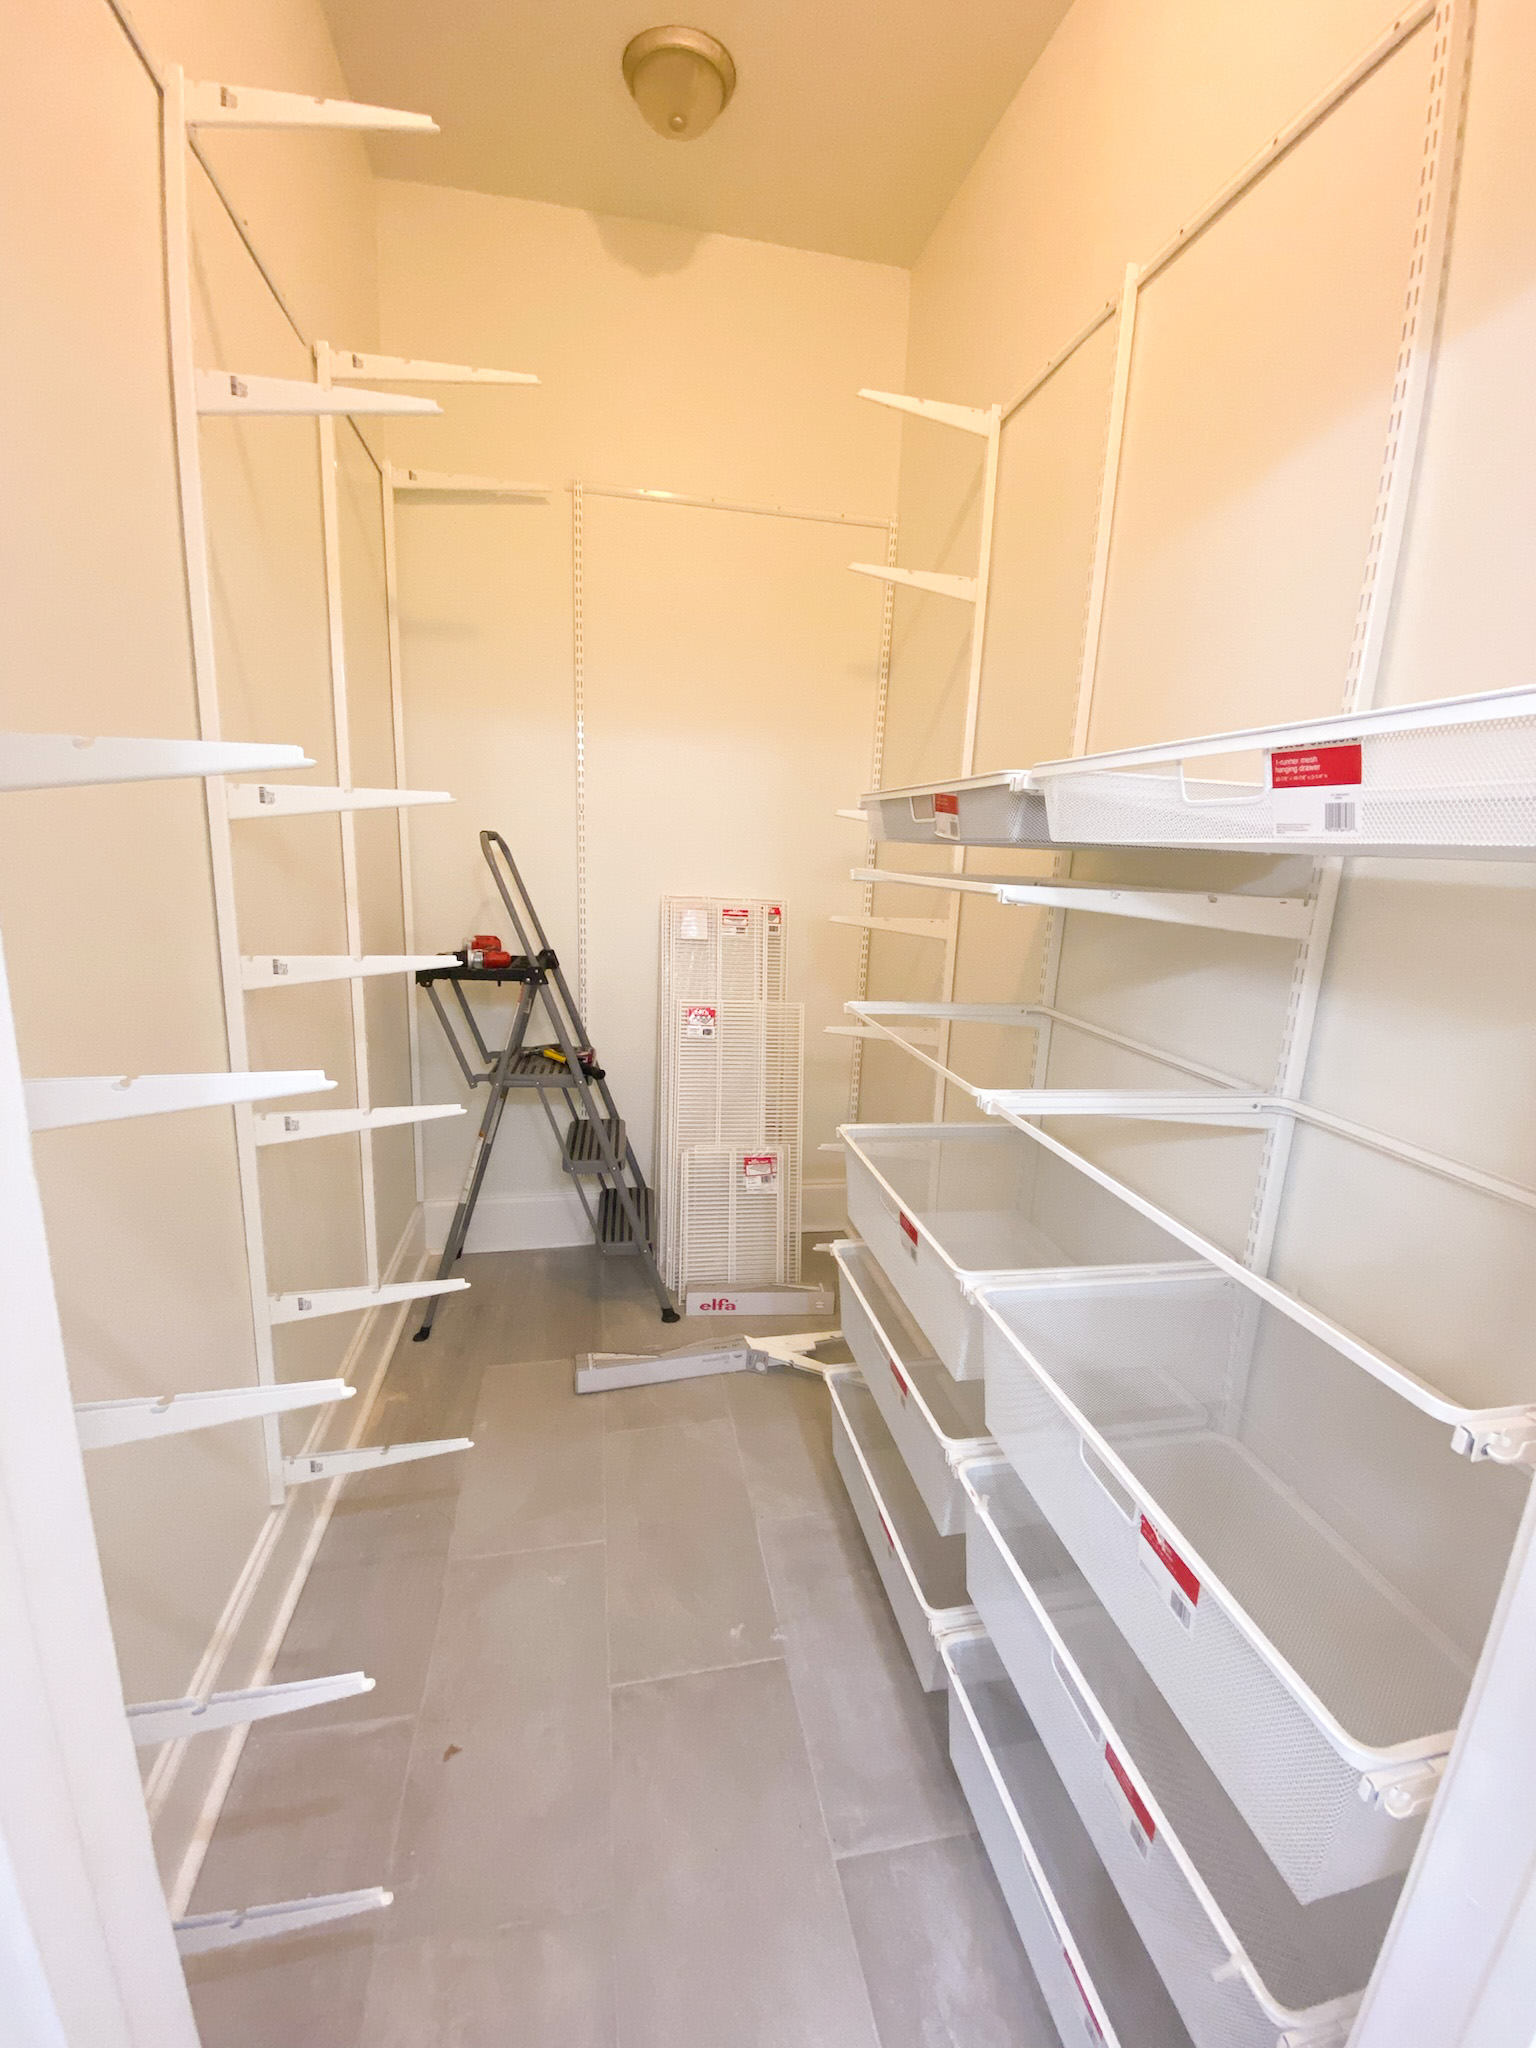
Elfa Closet System Install: Vertical Tracks, Brackets, Shelves, Drawers
After installing the top track system, everything else snaps into place! First, you’ll hang the vertical tracks and insert the brackets. The awesome thing about the Elfa closet system is that you can move things around so easily and customize the closet design even after you’ve begun the installation process. The only items screwed into the wall are the top horizontal tracks. Everything else is easily moveable.
The brackets click into the vertical tracks pretty easily. You’ll follow your design for spacing on these. But again, you can space out the shelves, drawers, and hanging as you please and finagle it to how you prefer as you install the system. We actually flipped the walls of our original design because it ended up fitting better that way once we started putting the brackets in.
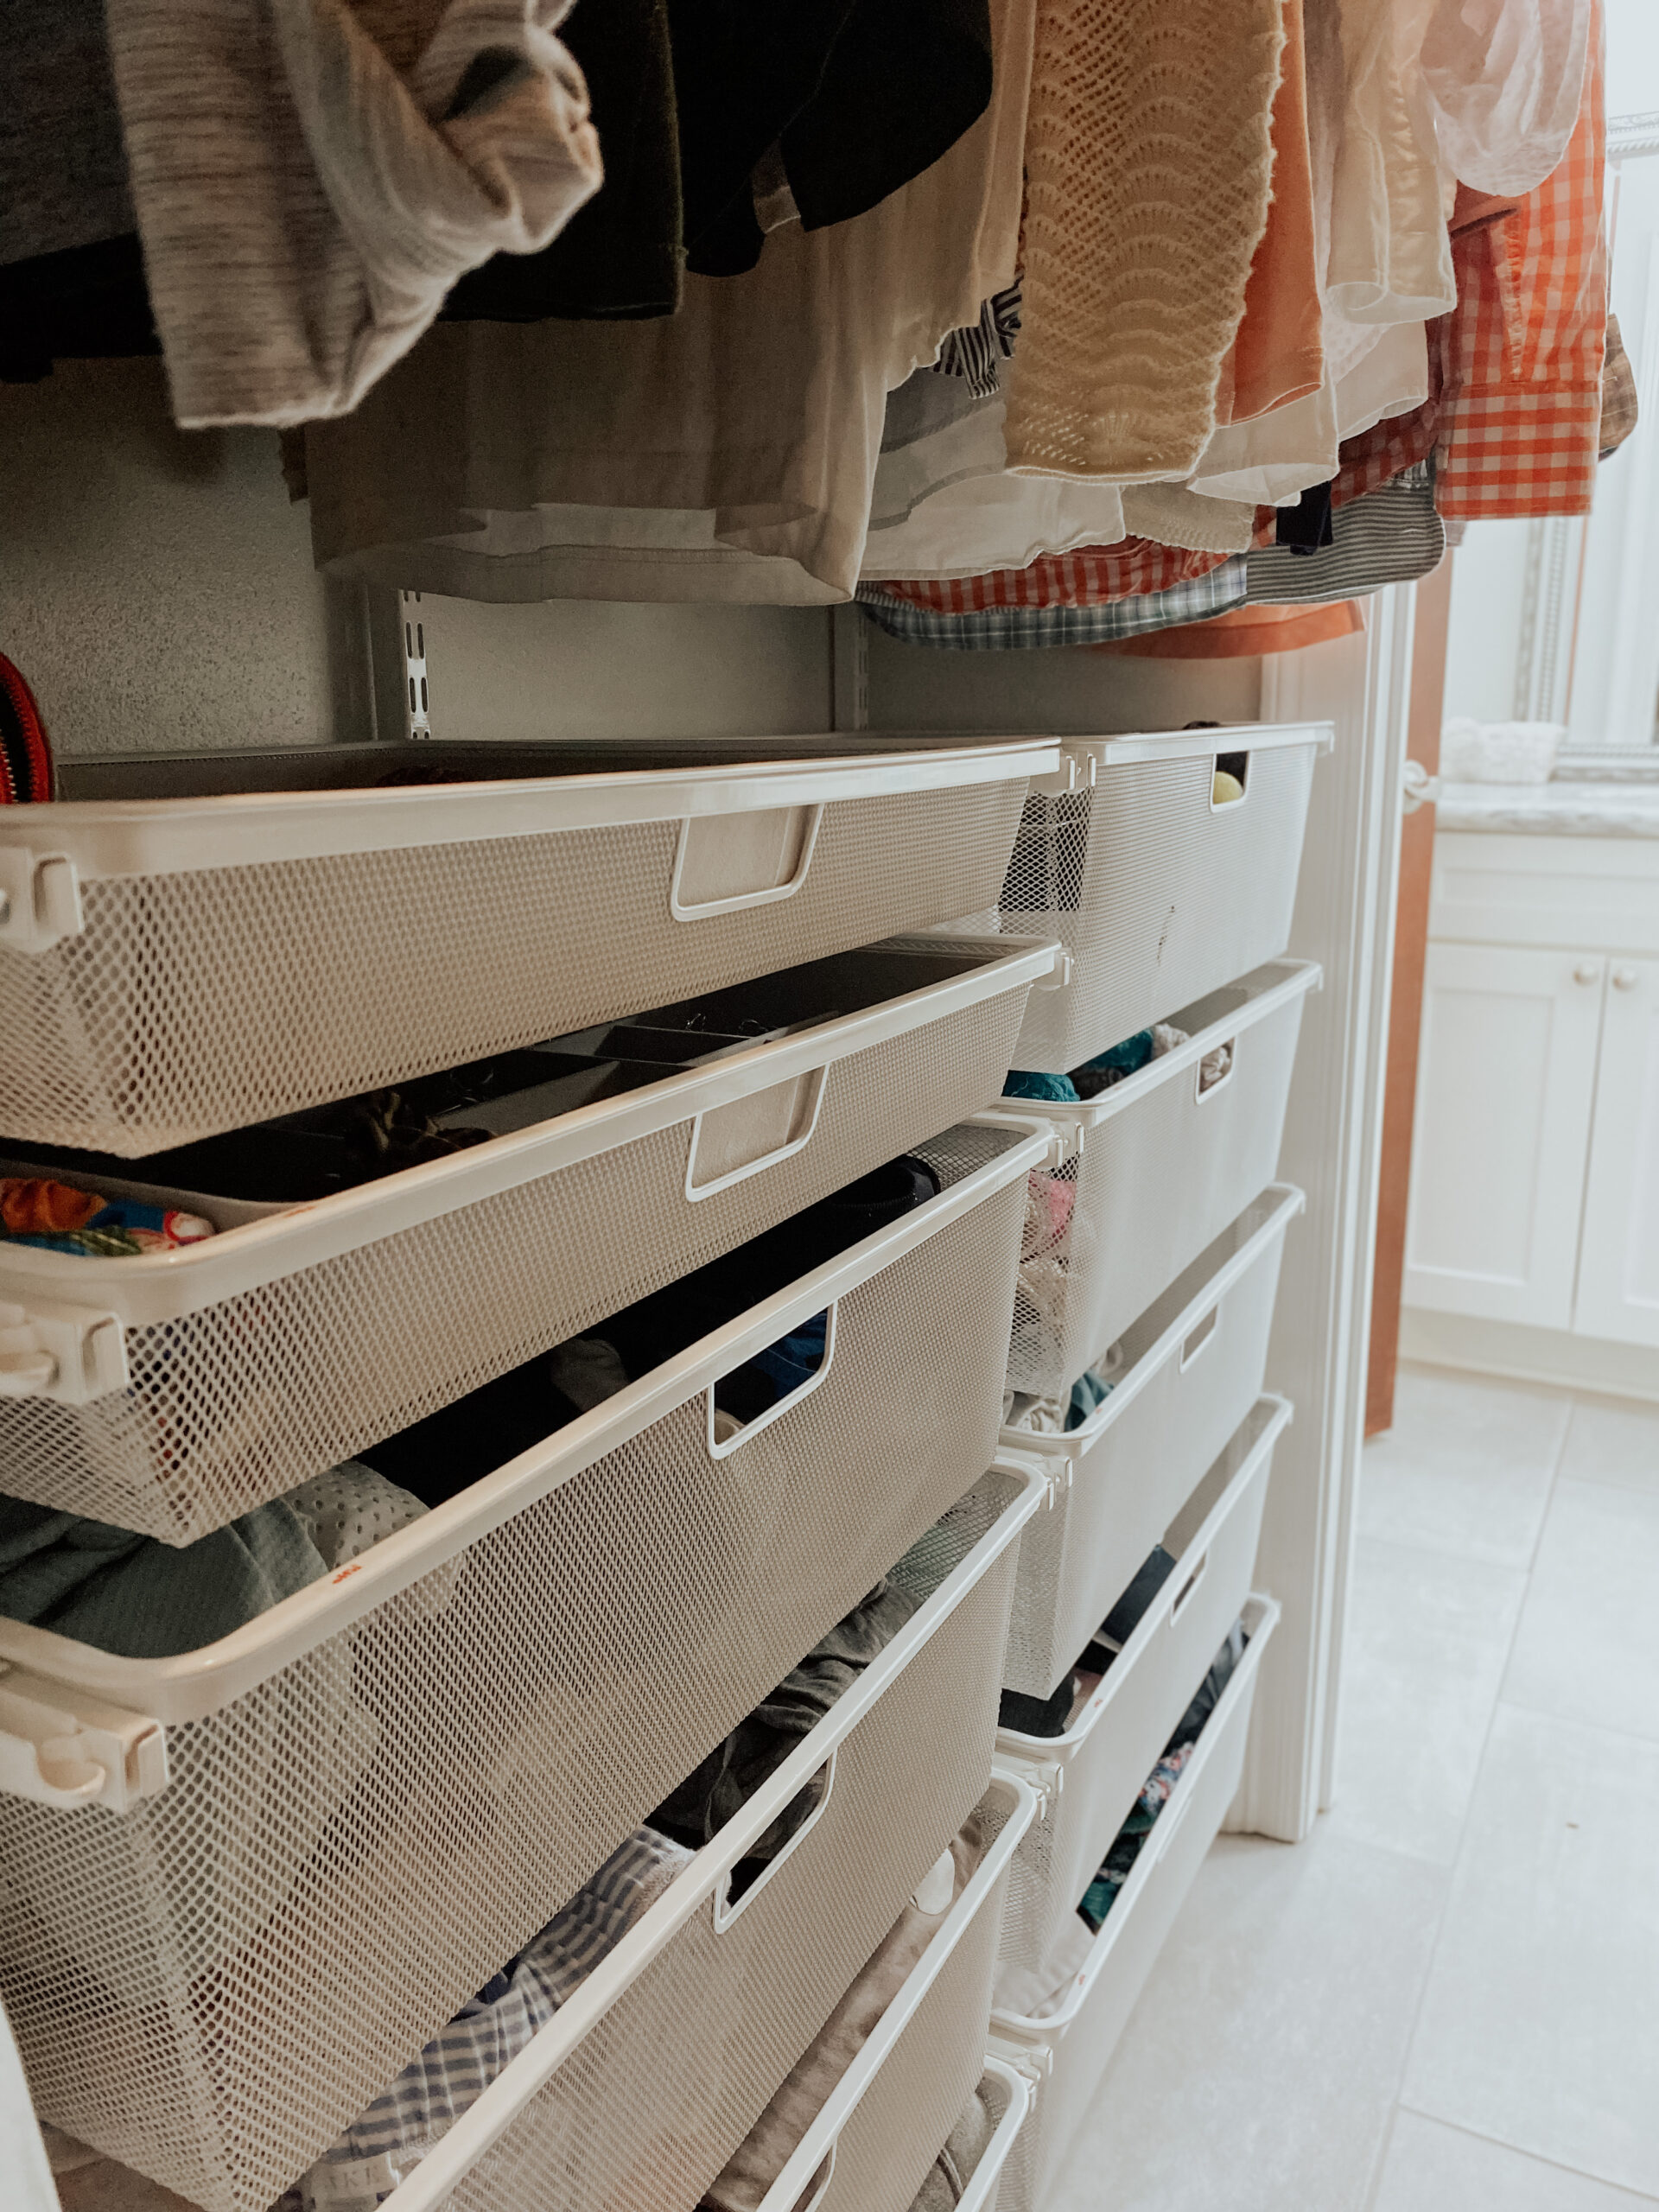
The shelves clip into the brackets. Once you figure out how to clip one in, the rest are easy. The hanging rods attach to the brackets too – very easy! The drawers take a bit of patience to install. I’d say they’re the second hardest thing to install after the main horizontal tracks, but with that said, once you figure out how to do one, the rest aren’t too bad.
Now the fun part! Adding accessories and finishing touches!
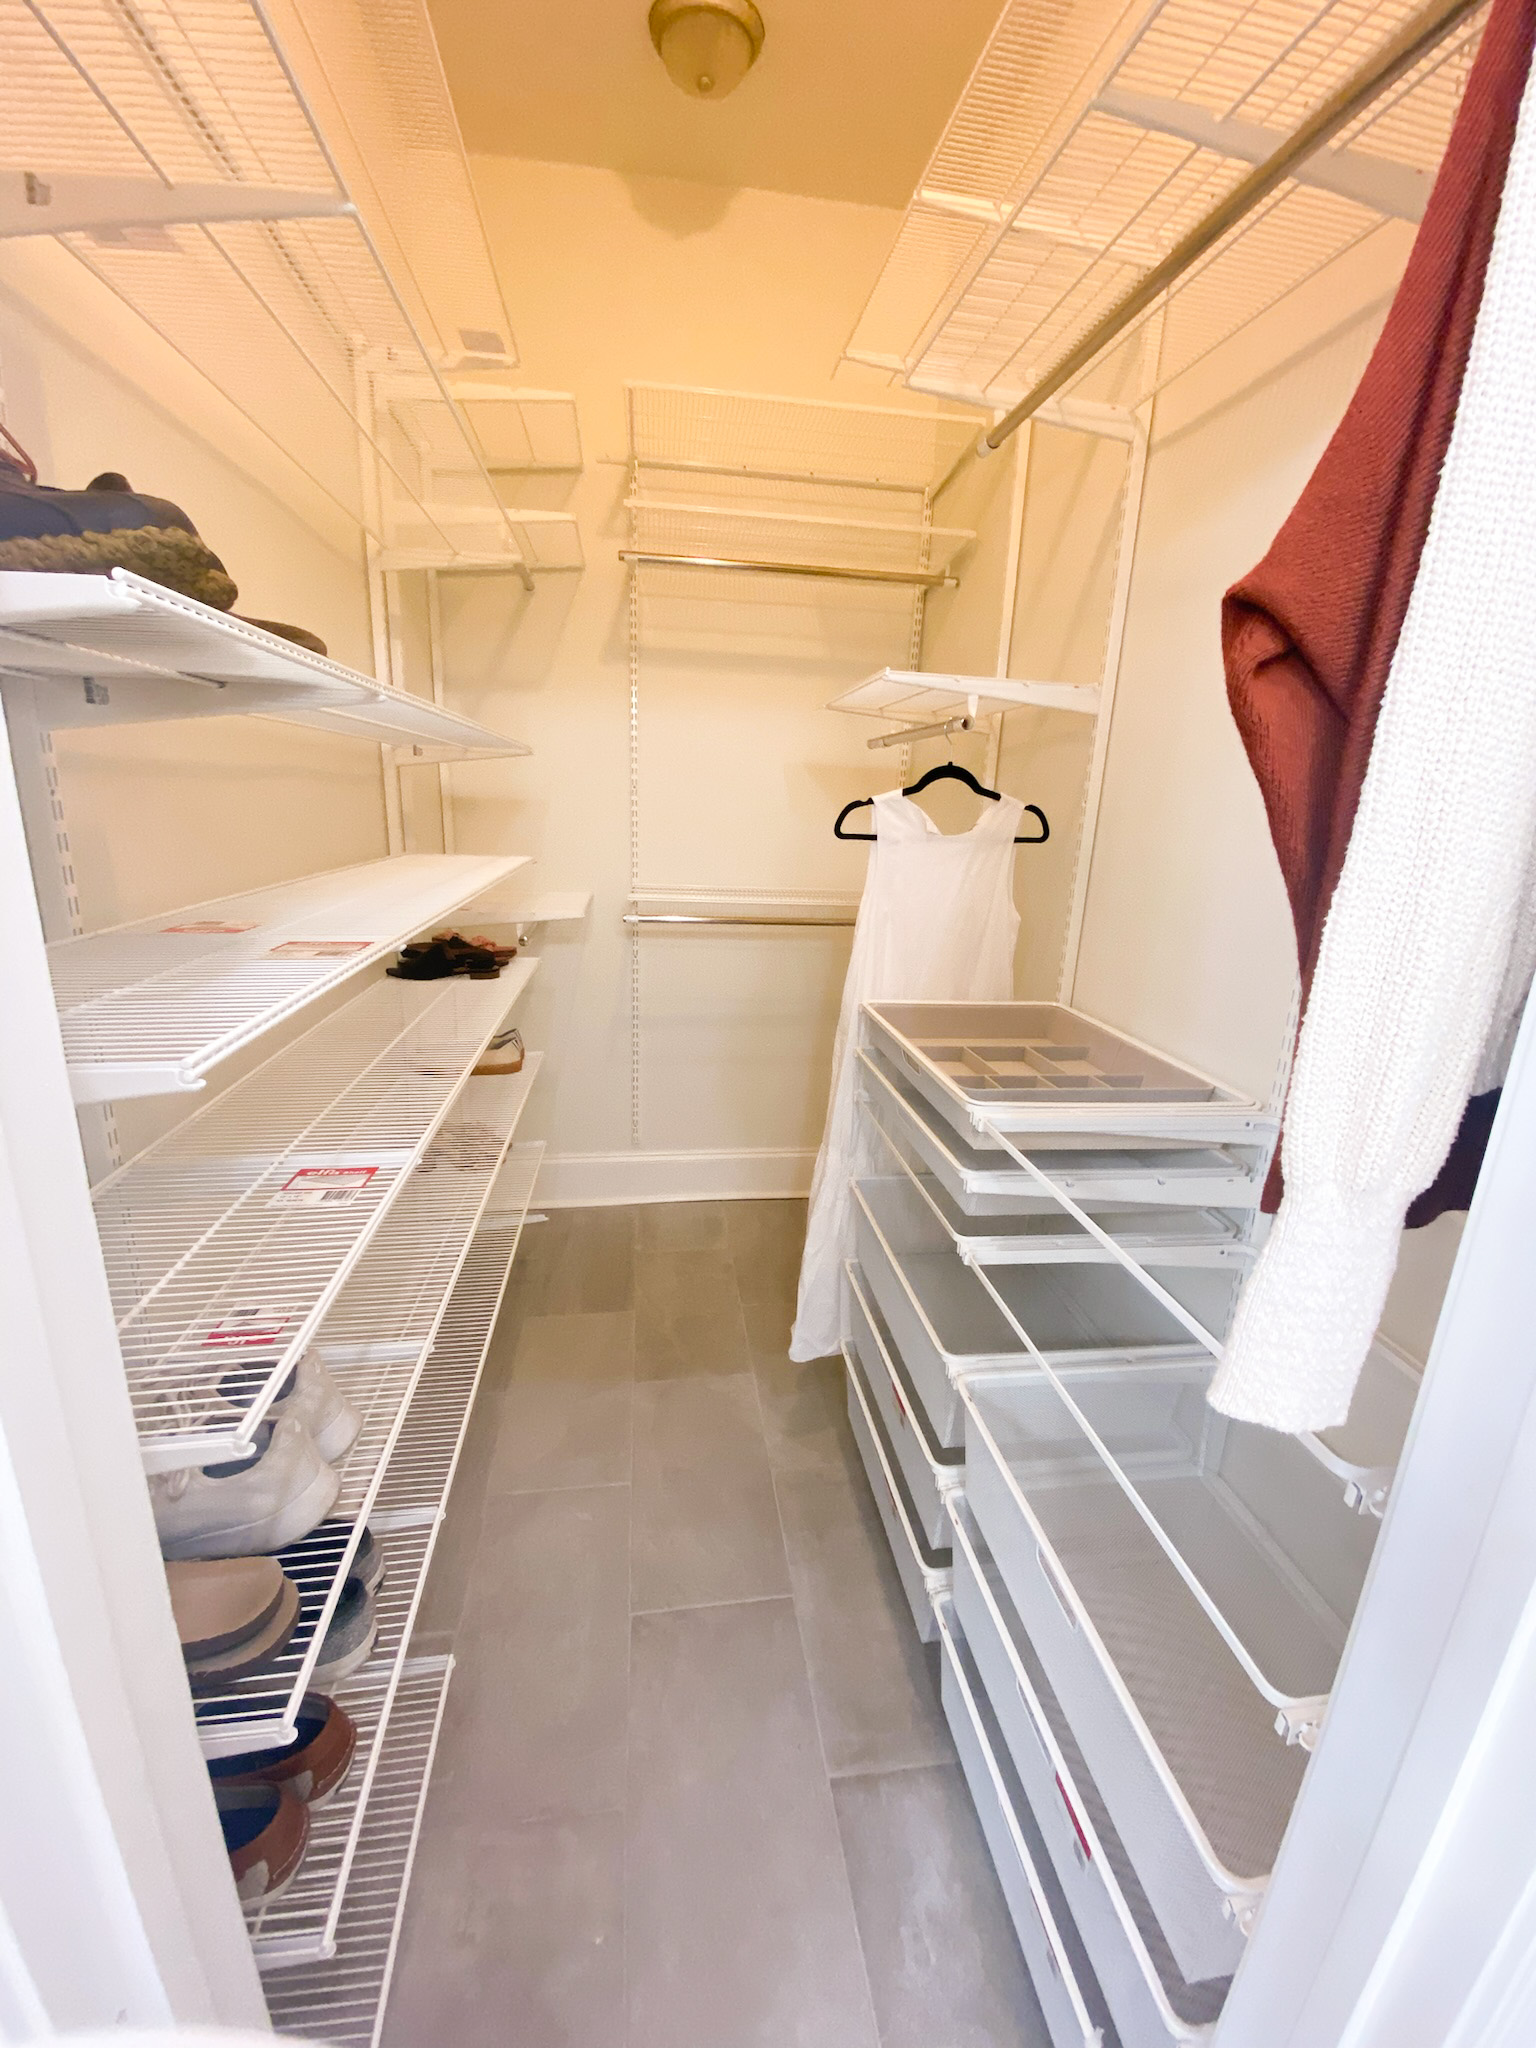
Closet Installation: Finishing Touches
You can see where I chose to have two slim drawers – I wanted these for my jewelry. I added these jewelry organizers to the drawers, and I LOVE how they look! I love that I can see all of my jewelry at one time – and nothing is tangled! Praise be!
Another accessory I added is this hook system that clips right into the brackets. For some reason, The Container Store only makes the hooks to fit the 16″ brackets. I have 12″ brackets on the side of the closest that has the space for hanging items (belts, crossbody bags, ties). I ordered the 16″ hooks anyways just to see if they’d work. They’re totally fine and work great! Yes, it’s a little longer than the bracket, but it clips into the 12″ bracket and serves its purpose perfectly!
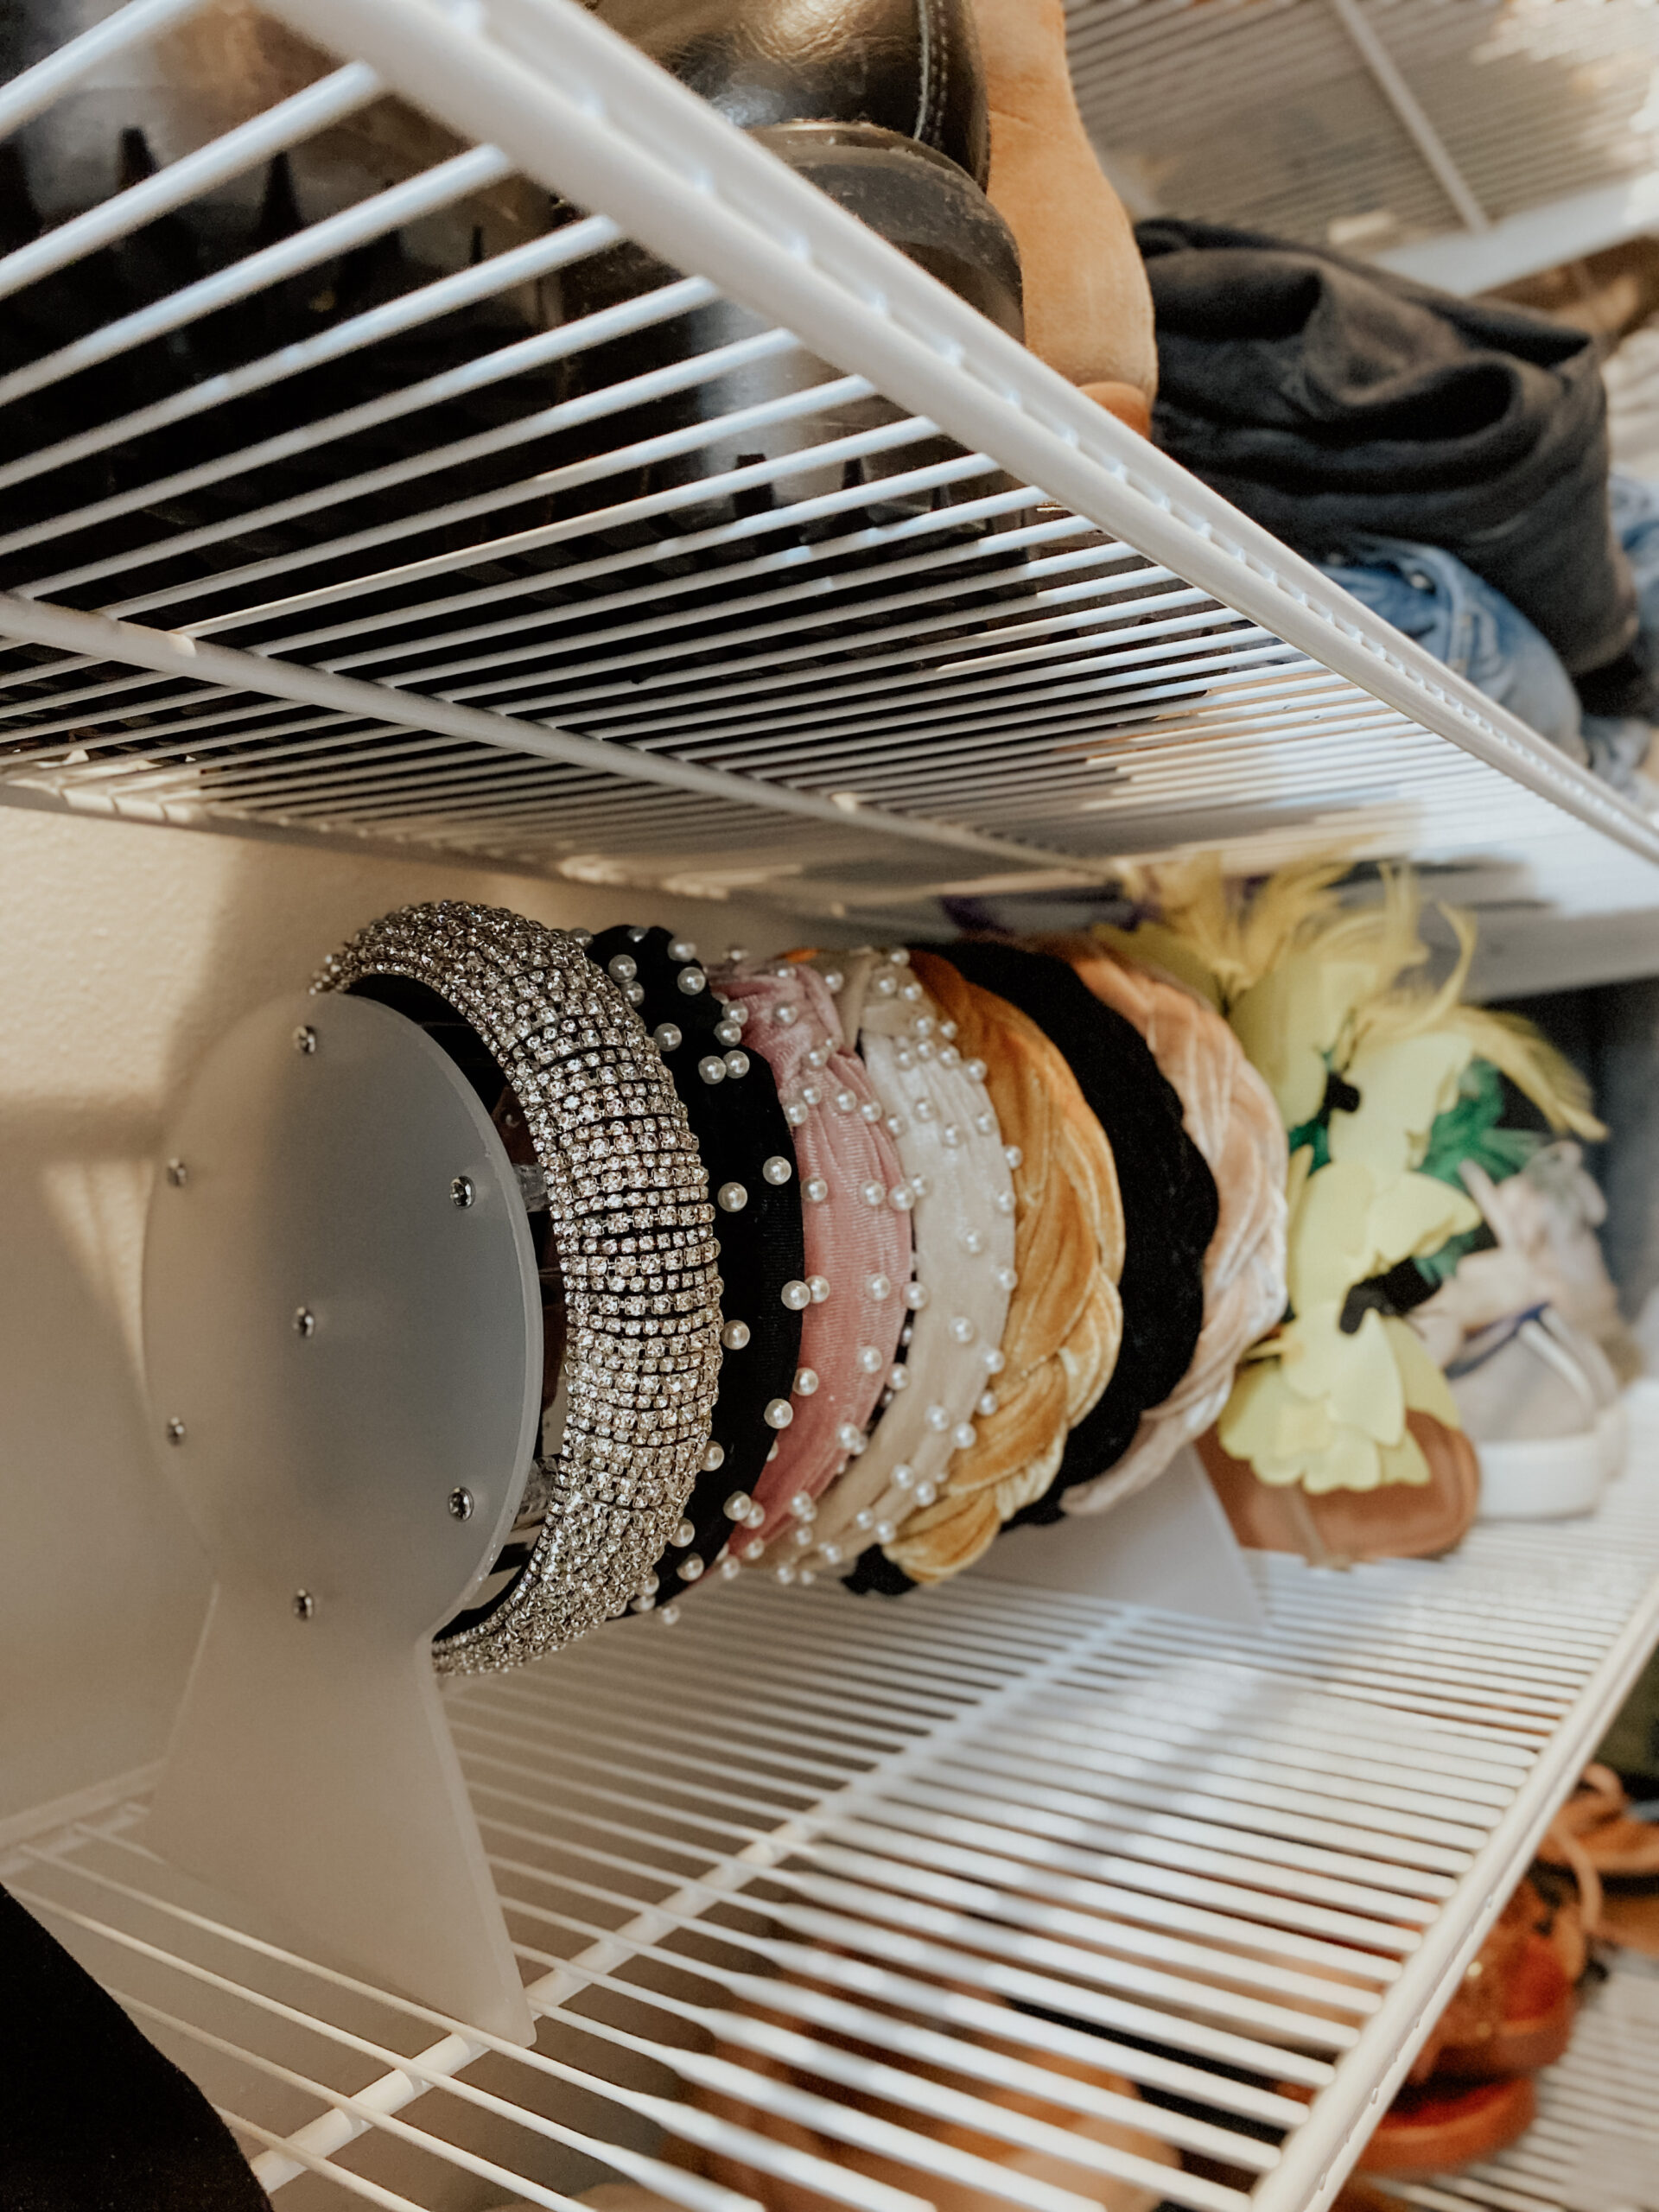
Lastly, I added two organizational accessories that aren’t from The Container Store. This headband organizer brings me so much joy! Like my jewelry, I love that I can see all of my headbands in one place all at one time! I also added two large baskets instead of installing the long bottom shelf as in the original design. Once I got all of my shoes in the closet, I realized I didn’t really need that shelf. I needed space for my t-shirts and scarves. These baskets are perfect! And they’re pretty too. I found them at my local Home Goods (Harvey location for my New Orleans people). Unfortunately, I can’t find them online anywhere.
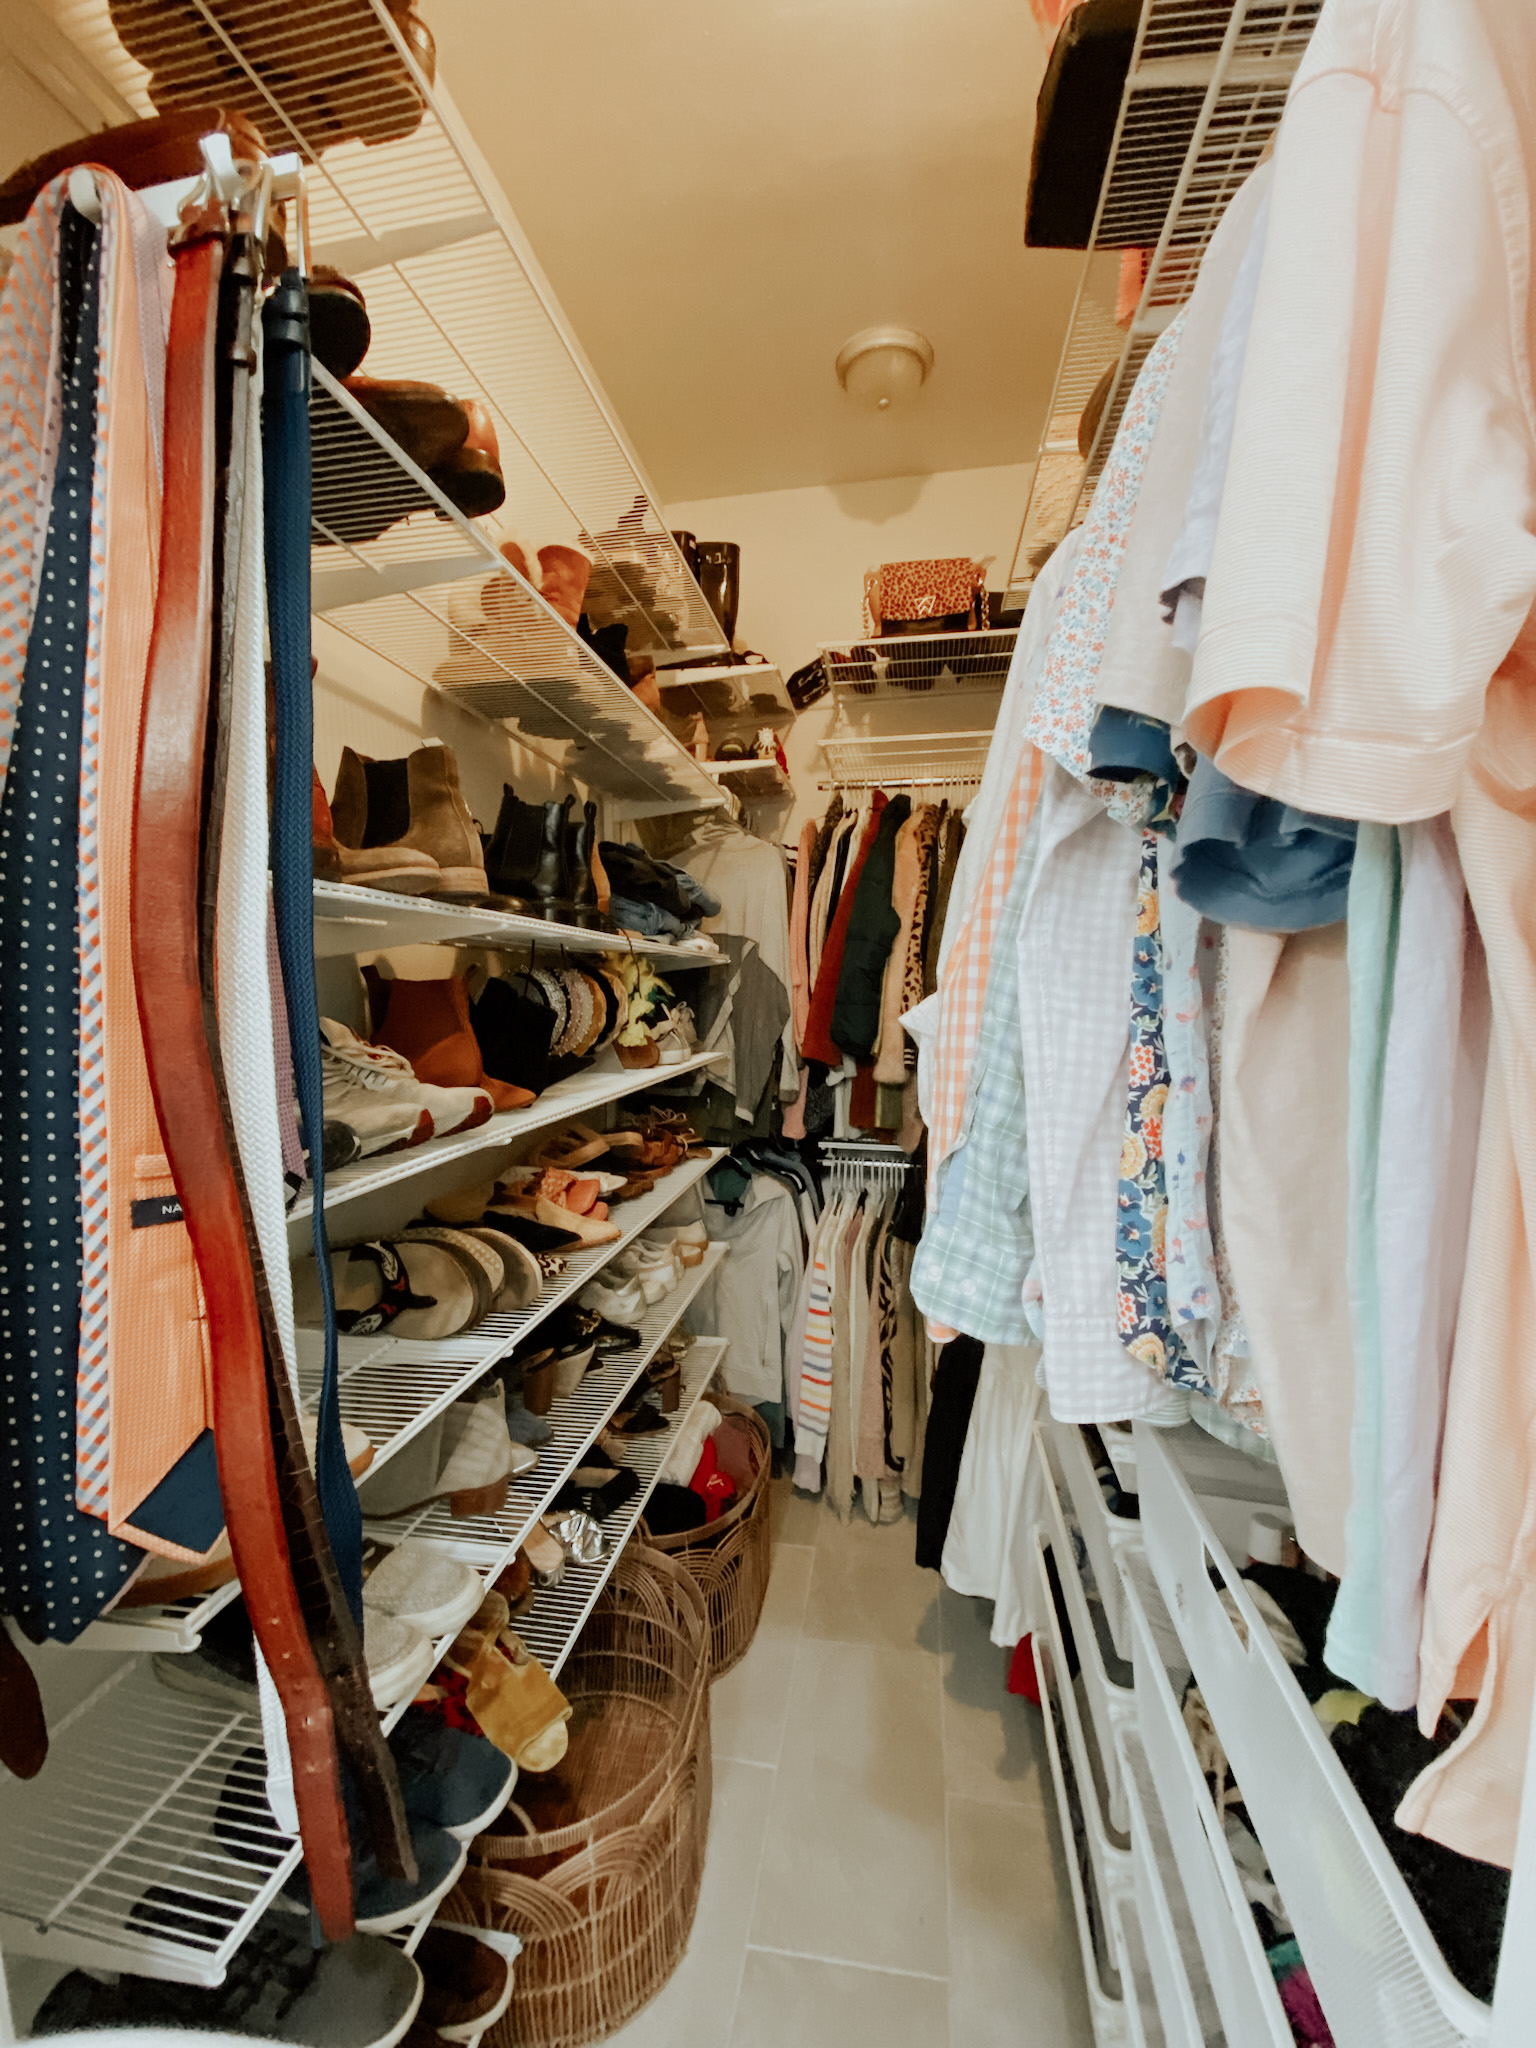


Final Thoughts
I’m so pleased with how the Elfa closet system turned out! The design and installation process definitely took some time, but in the end, it saved us around $2,000 in labor costs by designing and installing it ourselves (with the help of the Closet Design Experts at The Container Store – over the phone).
All in, the installation process took us a full week, working an hour or so each night plus one full day on the weekend to put finishing touches on the install and load all of our items into the closet. As for cost, after returning some of the original shelves and brackets that were part of our design that we didn’t end up using, we spent around $2,500. Our closet truly brings me joy! I find myself just popping in while brushing my teeth, while on the phone … just to admire our work. 😉
This is our first DIY project and our first big project to tackle as first-time homeowners. If we can do it, you definitely can too! Feel free to email me with any questions if you’re considering the Elfa closet system yourself! [email protected]


No injuries were recorded as well 😉