There’s nothing quite like New Orleans’ carnival season! Carnival season starts on the Epiphany, January 6th. From January 6th all the way to Mardi Gras (Fat Tuesday) New Orleanians celebrate. There are numerous events, balls, and parades leading up to Mardi Gras day. The parades each come with their own events and traditions. Different krewes make up each parade, and each krewe (most, but not all) have a signature throw. (A throw includes anything that’s thrown from the floats during a parade.) Upon moving to New Orleans in 2021, I joined the Krewe of Cleopatra, an all female krewe. Our parade rolls on the Friday of the first (big) weekend of parades. Our signature throw is the glitter cup!
Over the past few years, I’ve learned the ins and outs of decorating the Mardi Gras glitter cups. Every time I share a snippet of the craft on Instagram, I’m inundated with curious questions. So I figured I’d put together a step-by-step post on how to make the Mardi Gras glitter cups!
How to Make Mardi Gras Glitter Cups
Making the glitter cups is a multi-day process as there are drying days involved. Keep that in mind before starting! First, you’ll need to gather basic supplies. I love using these acrylic wine glasses as the shape makes them easy to decorate. For the first step in the process, you’ll need mod podge, sponge paint brushes, and glitter. Lots of glitter. Additionally, paper plates, a disposable table cloth, plastic drop cloths, and a folding table and chairs are very helpful. Glitter gets everywhere. Ideally, you would setup this craft outside. Even if you’re outside, I recommend placing a plastic drop cloth on the ground underneath a folding table. Use a folding table as your work space (or a table that you won’t mind glitter getting on). Add a disposable table cloth to the table and use paper plates for the mod podge and as glitter catch-alls.
Step One: Applying the Glitter
To apply the glitter, first use a sponge paint brush to apply a thick layer of mod podge to your cup. While the mod podge is still wet, sprinkle the mod podge with glitter. The glitter will adhere to the mod podge. I’ve found that it’s easiest to glitter the inside of the cup first, followed by the outside of the actual cup, and then the stem and base. You’ll end up with a fingerprint or two due to having to hold the cup, but don’t worry, you’ll be able to cover up the spots with decor later.
Set each cup on a paper plate to dry. Allow cups to dry for at least 24 hours.
Step Two: Setting the Glitter
Once the mod podge and glitter are dry, you’ll need to set the glitter with this setting spray. Complete this step outdoors, in a well ventilated space. Spray each cup heavily with the setting spray to ensure the glitter stays on the cup. Let the setting spray dry for at least 24 hours.
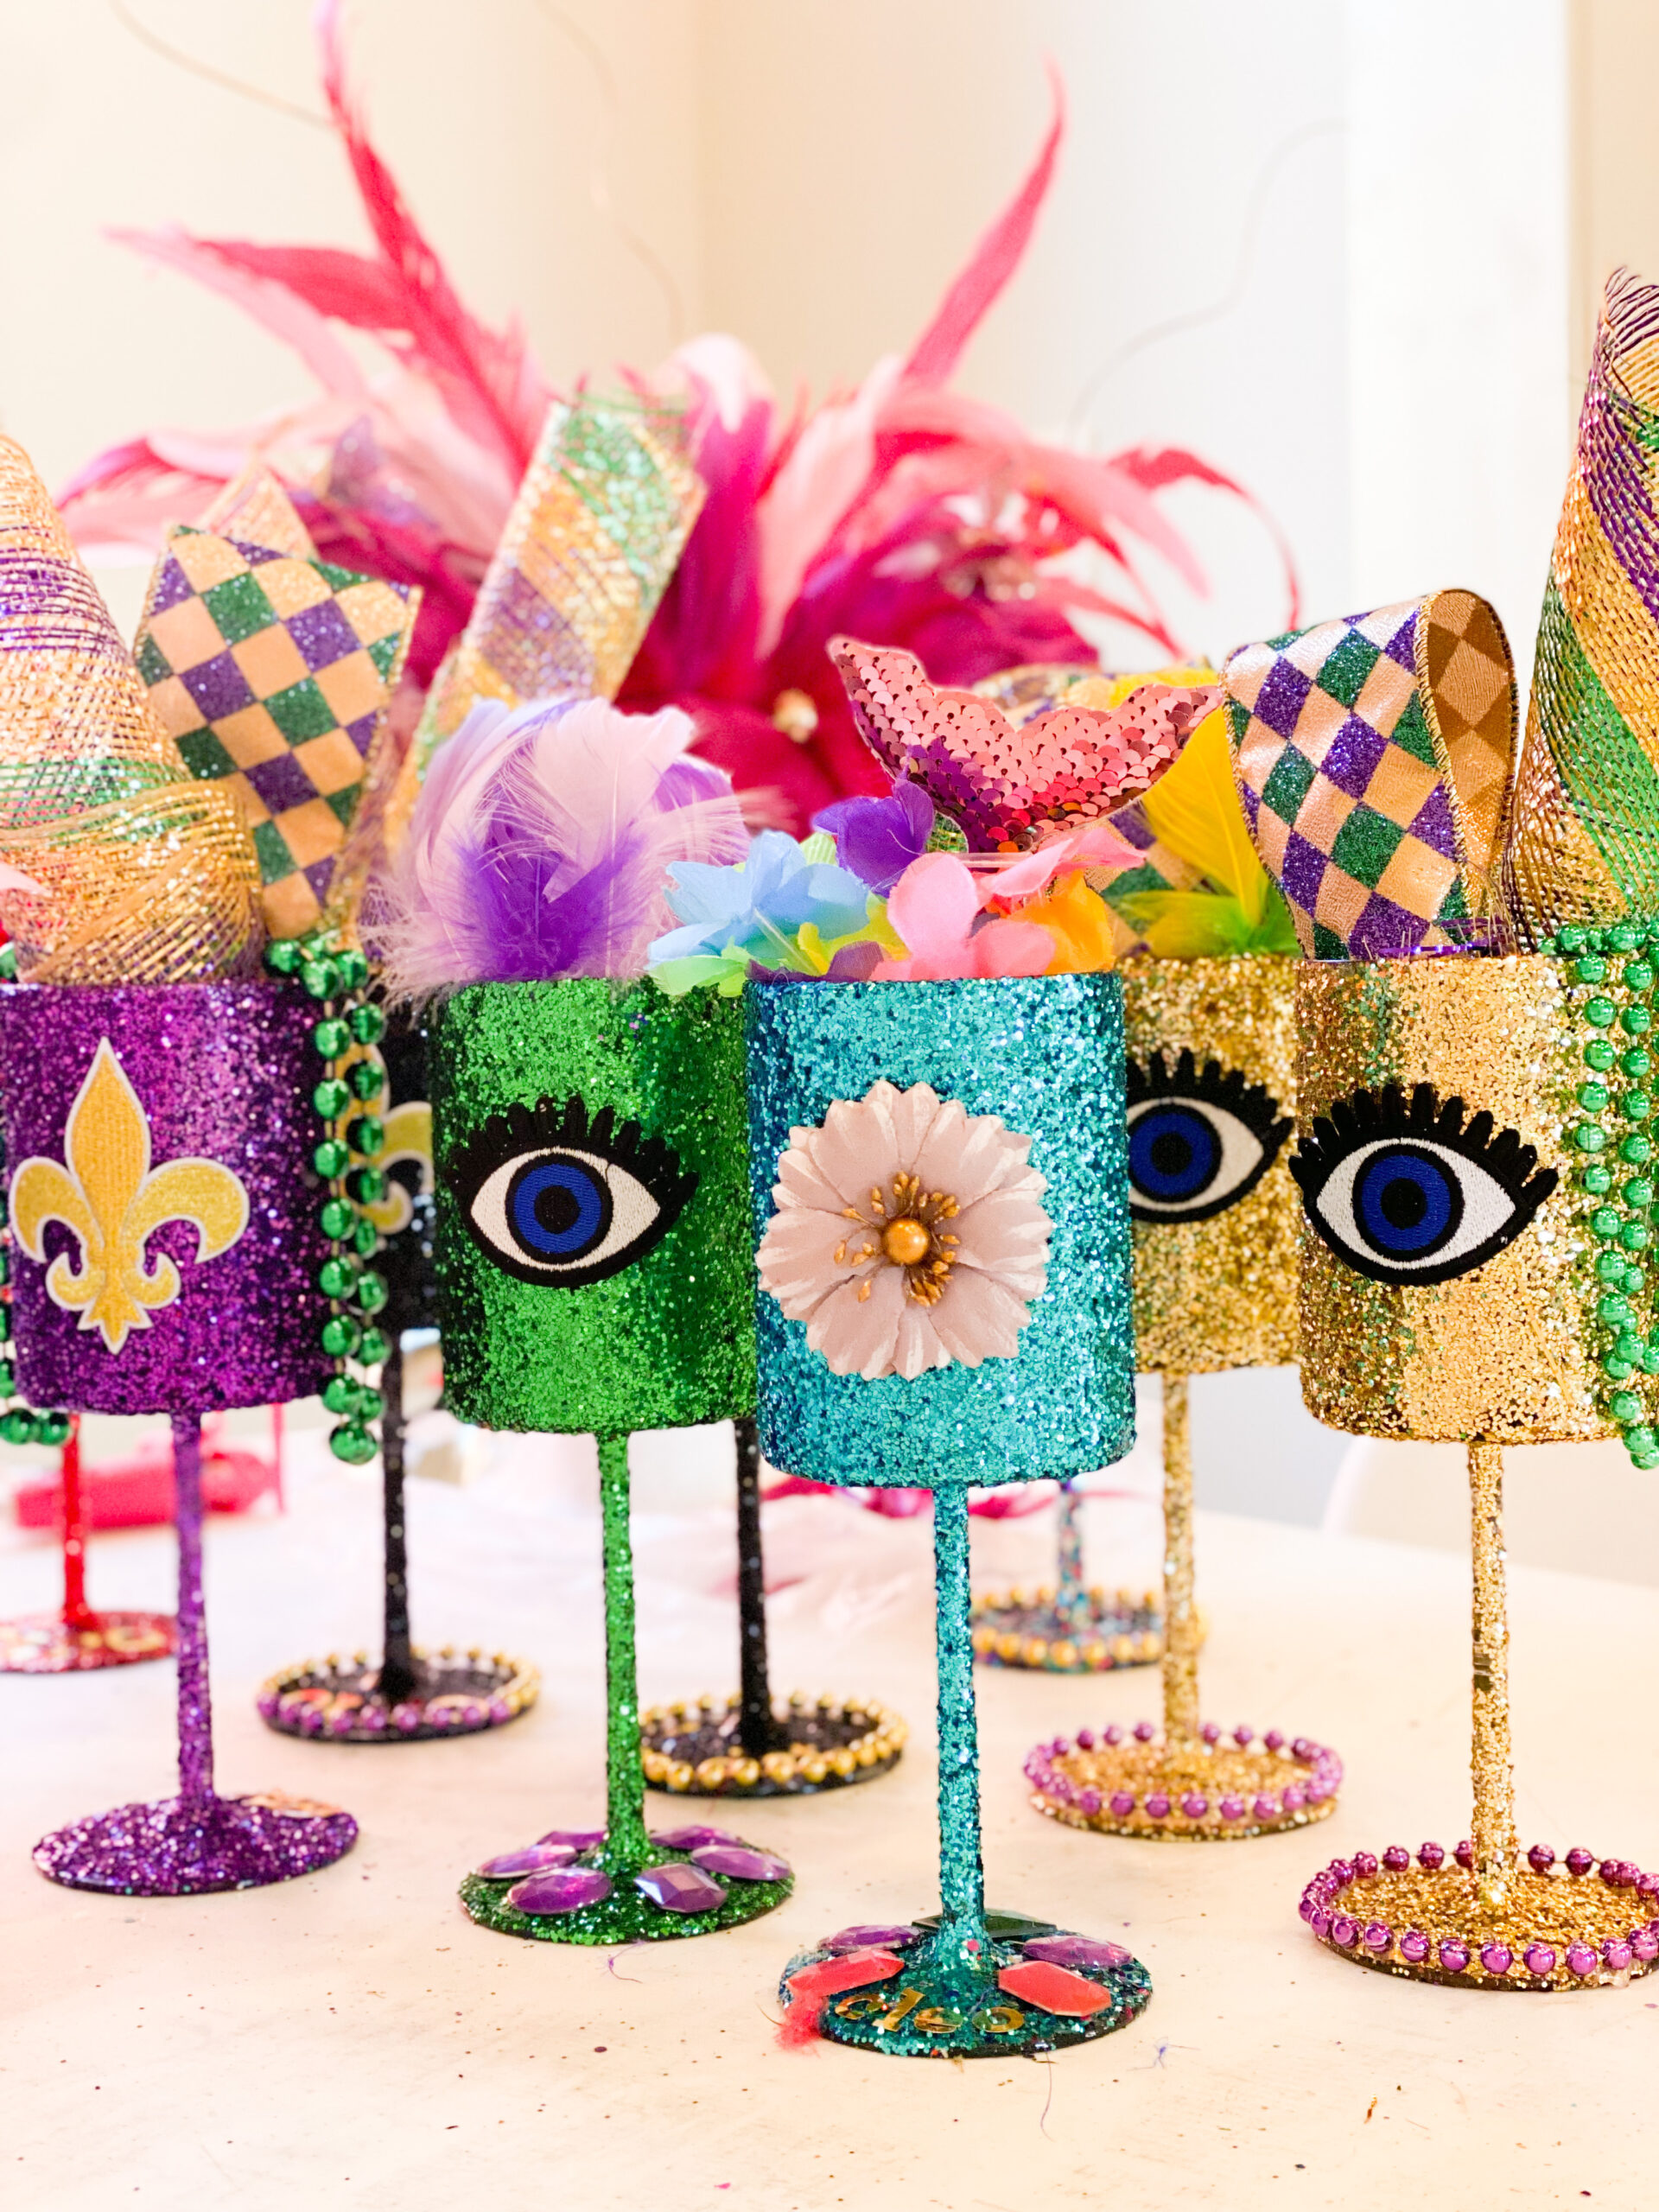
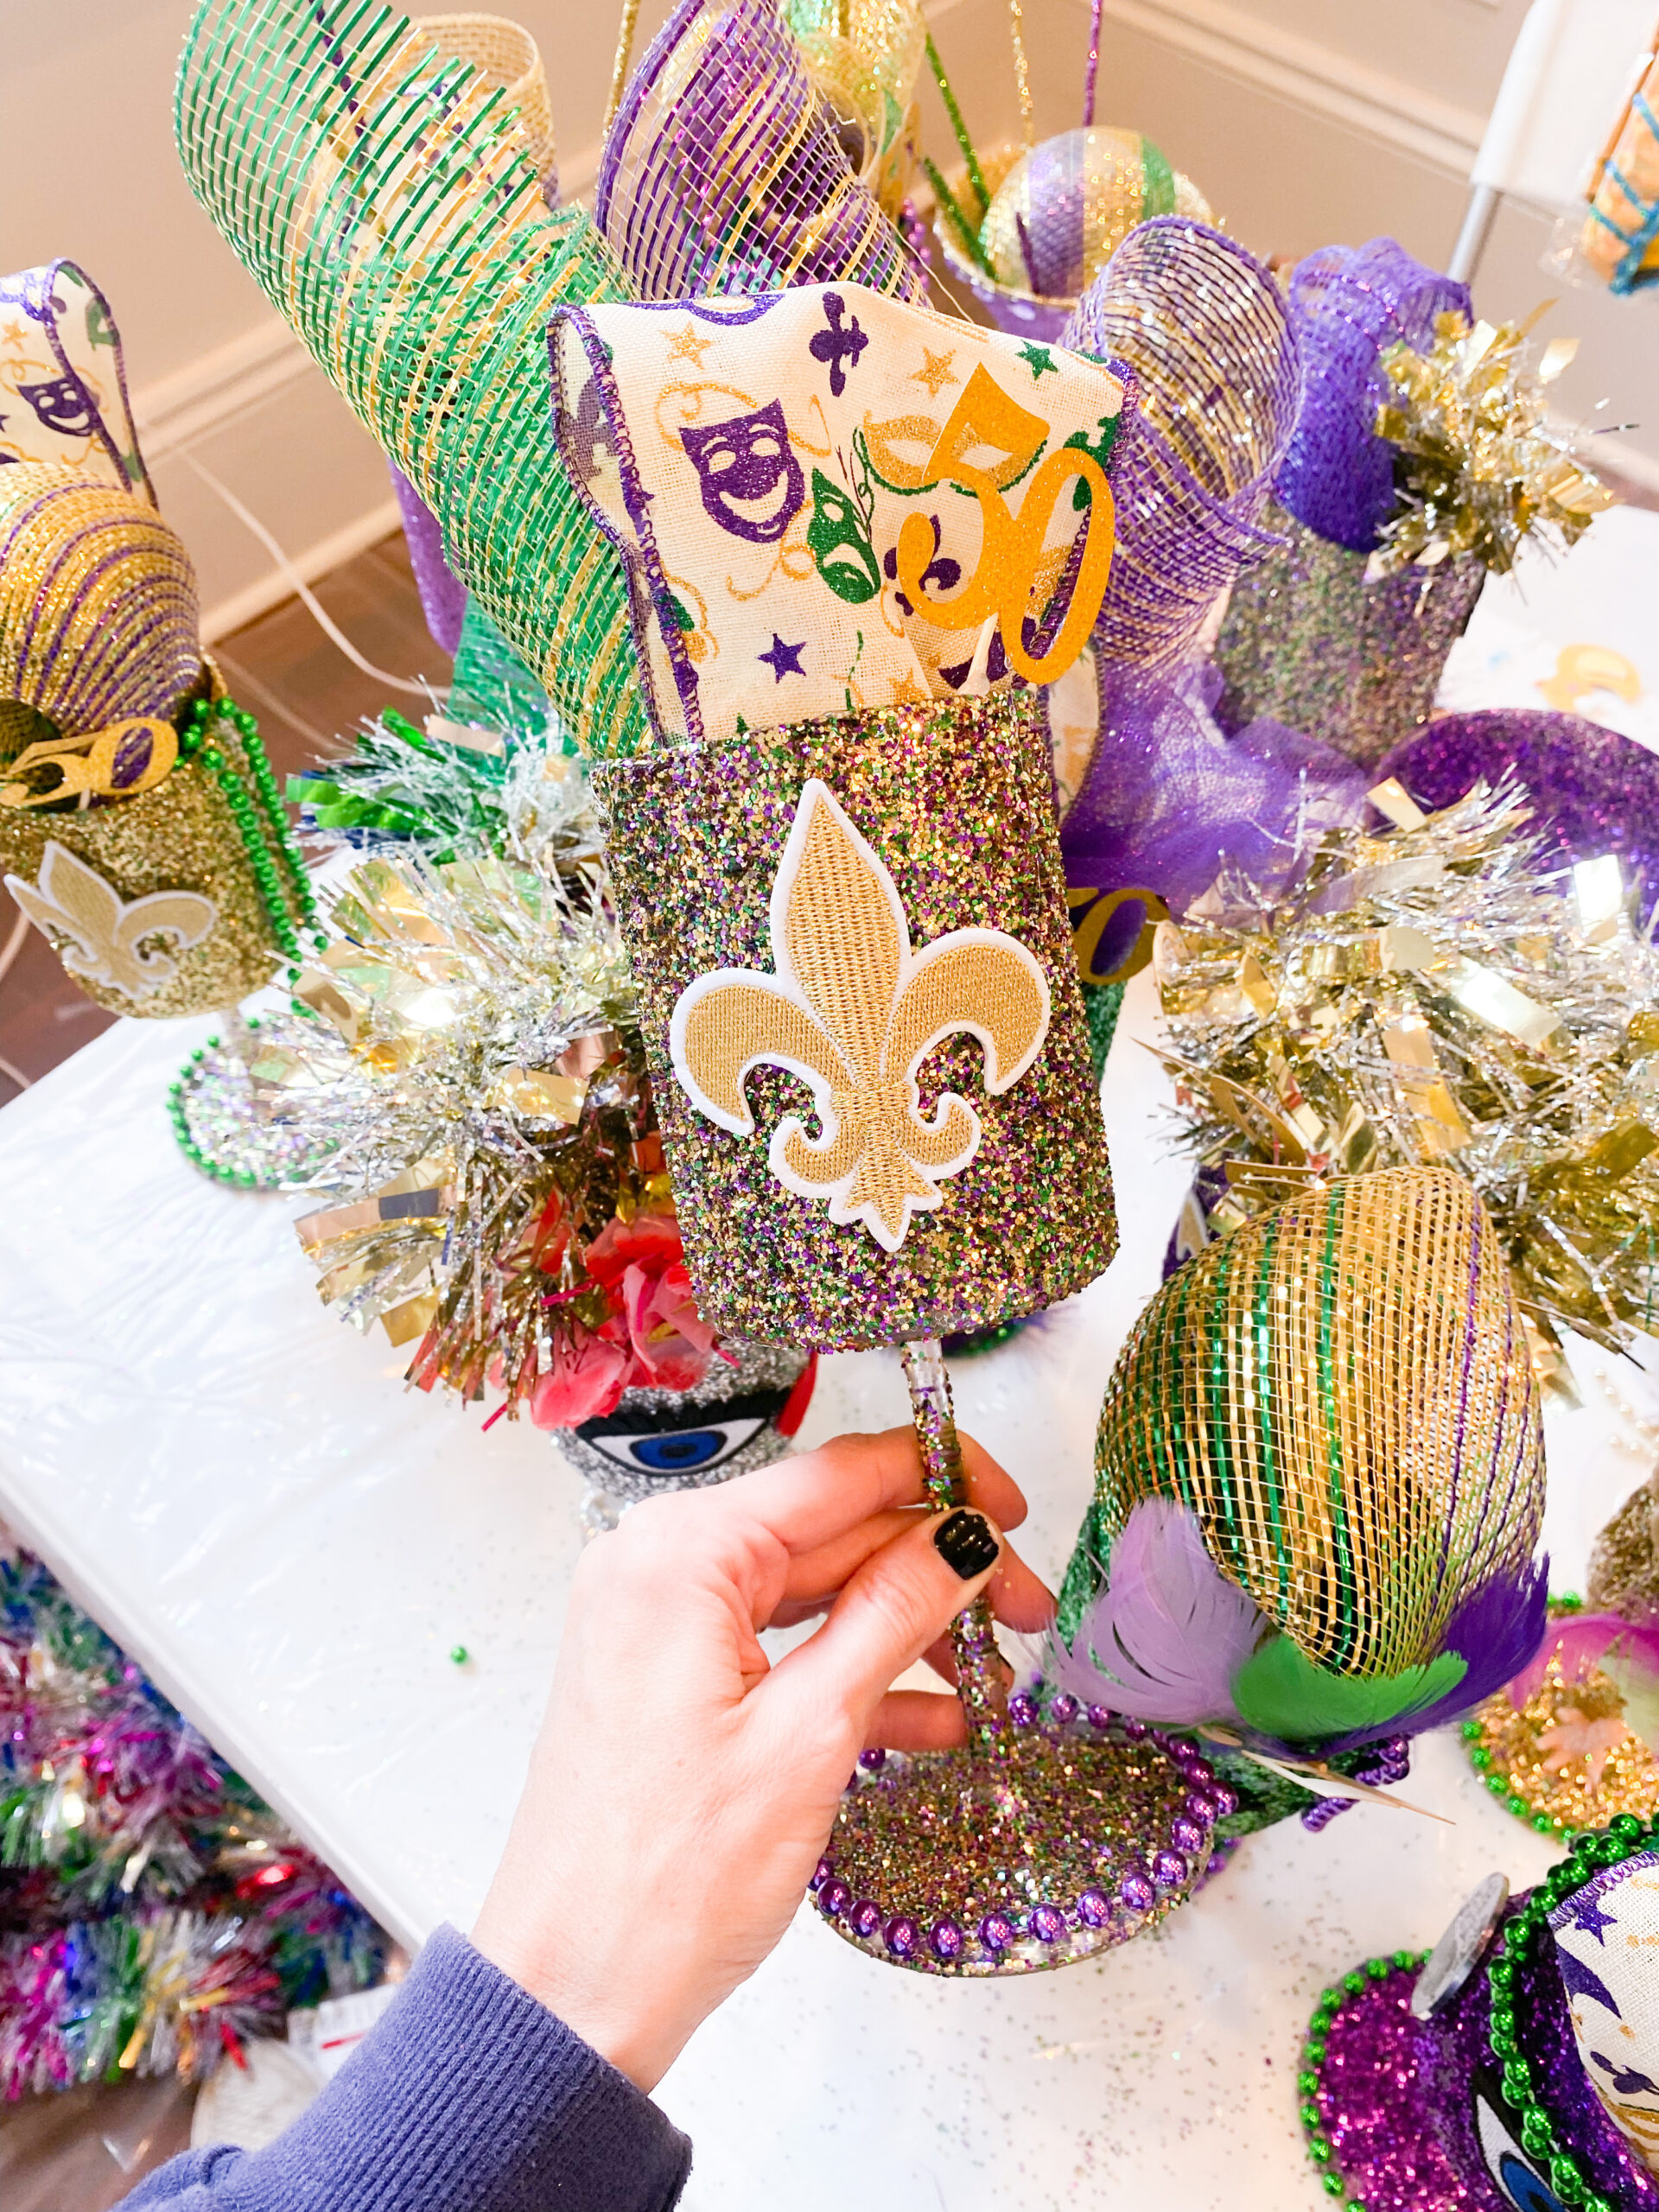
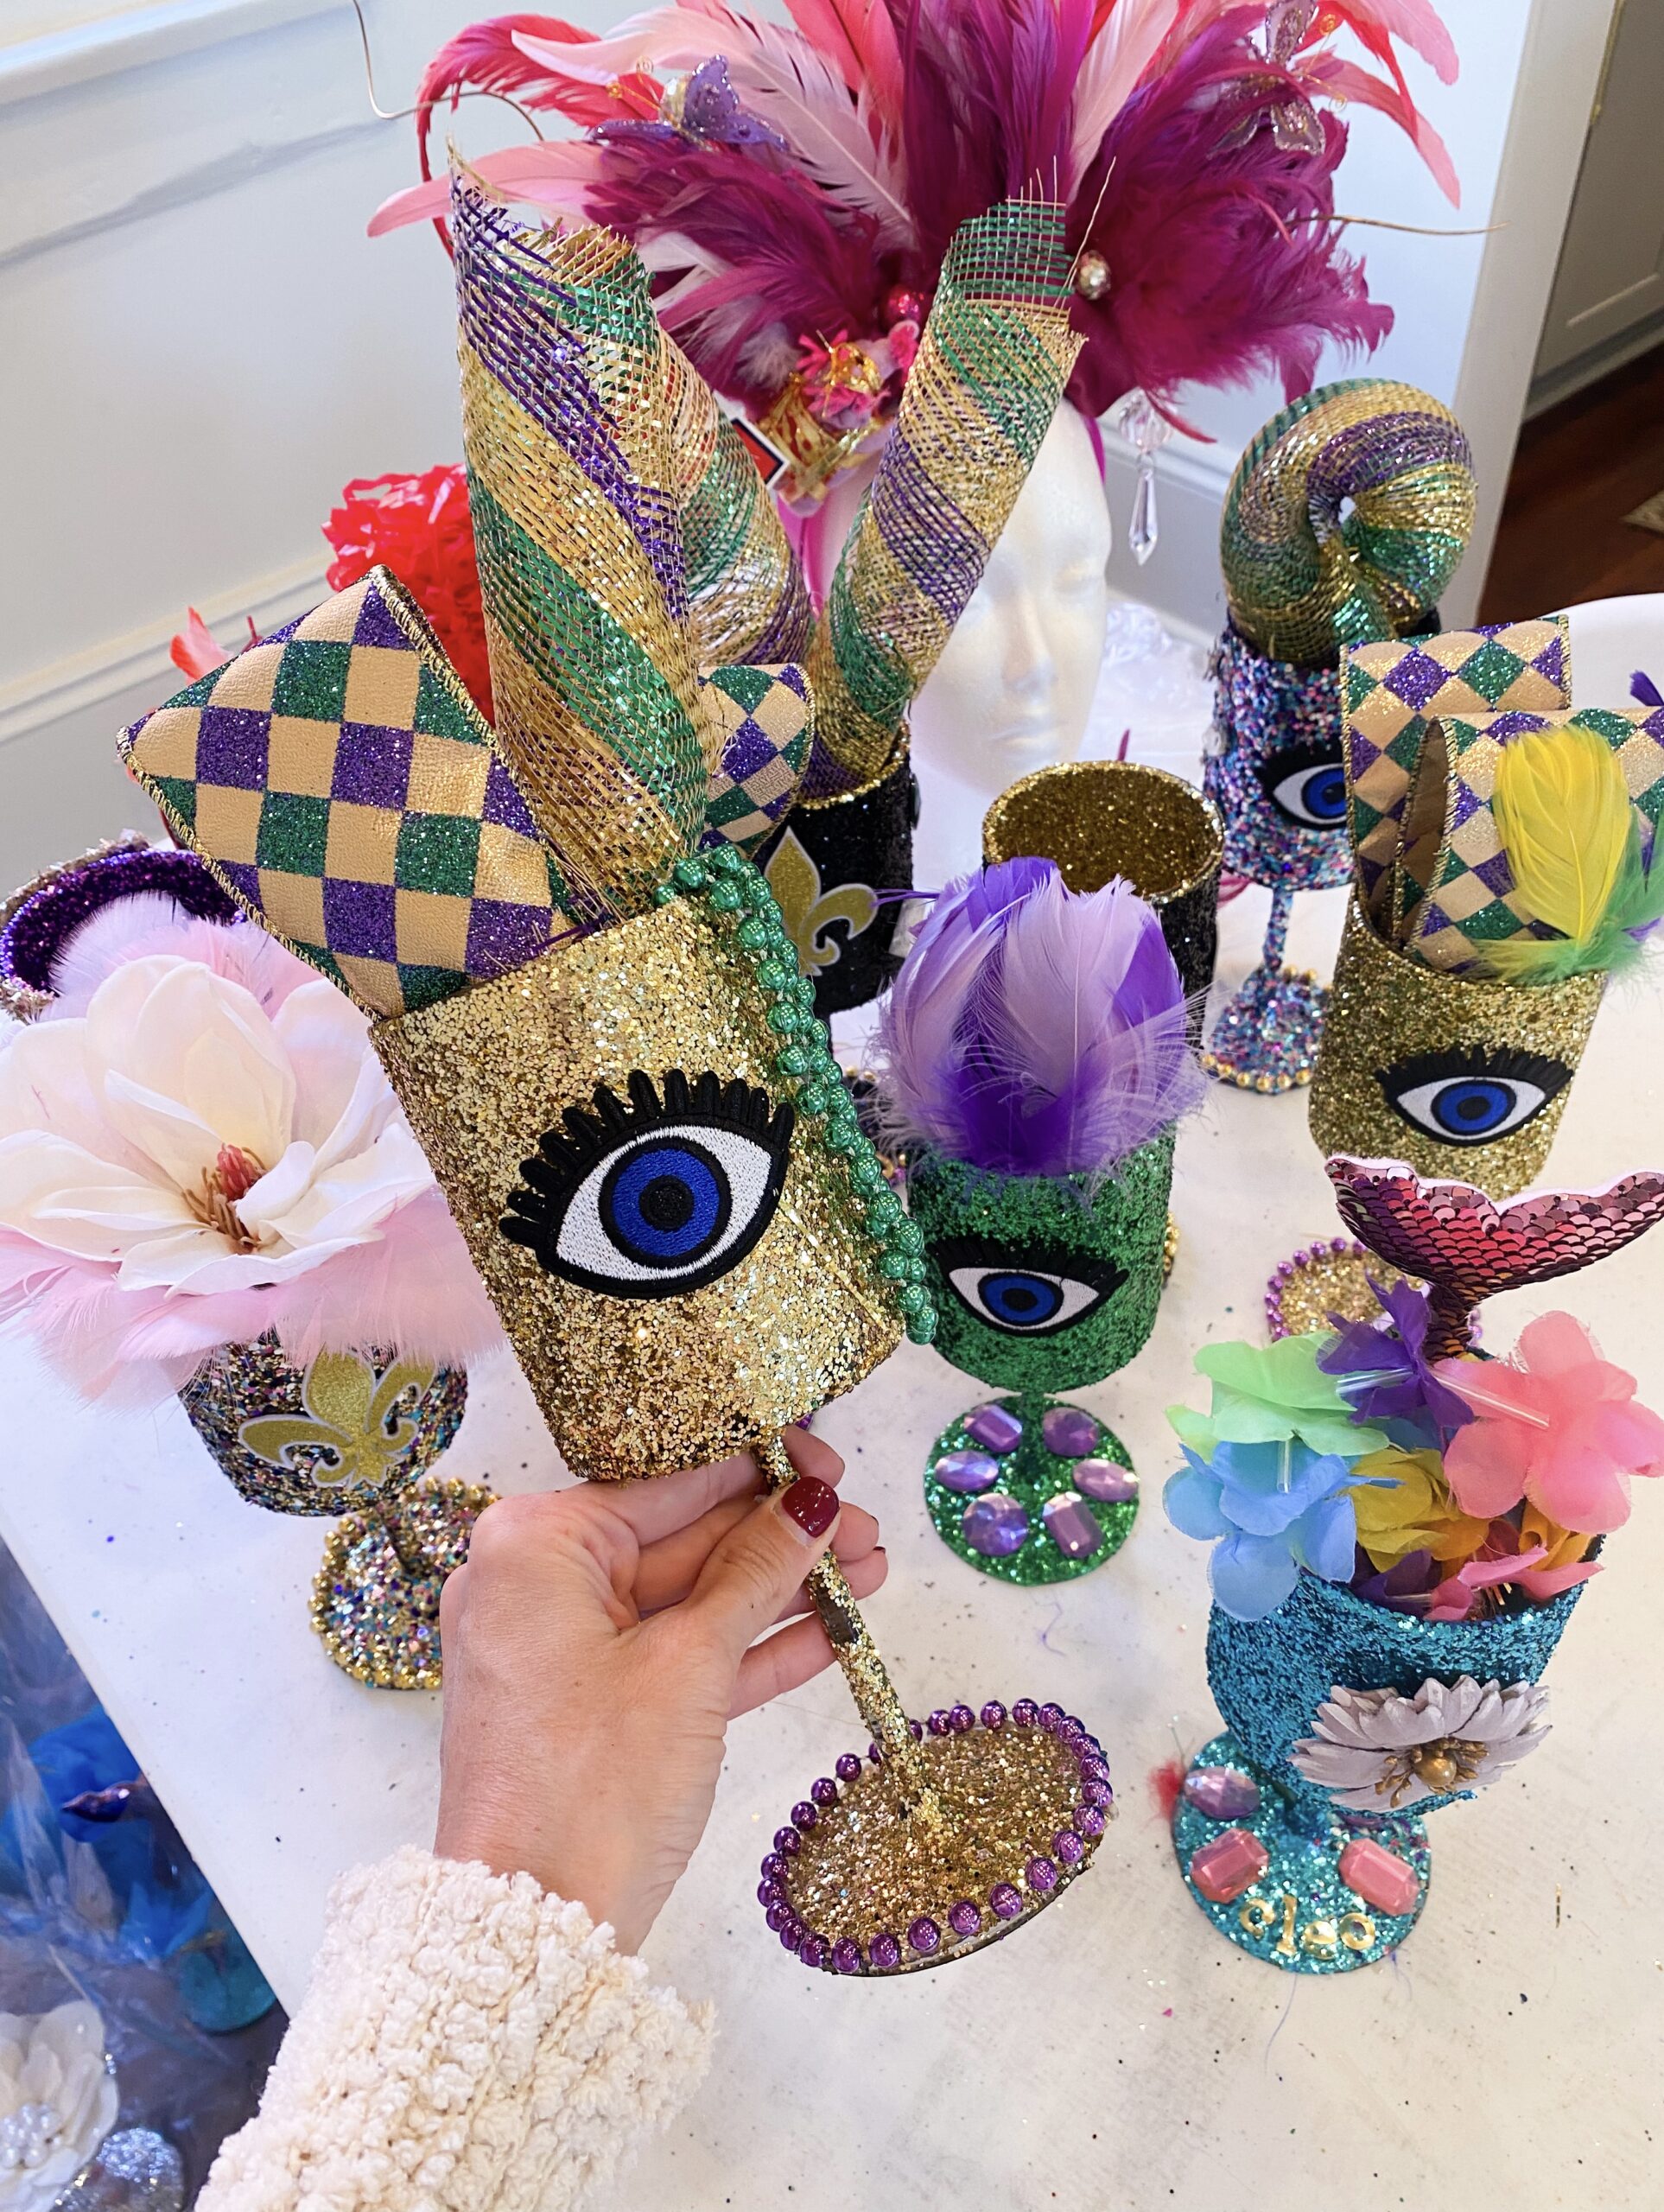
Step Three: Decorating the Mardi Gras Glitter Cups
The fun part! This is where your creativity can run wild! You’ll need a hot glue gun, glue sticks, and anything you’re thinking of glueing to your cup. It’s always fun to create themes for the cups, especially if you’re making the cups for specific recipients! I like to incorporate the theme of our float, our krewe name, and the year into my cups. Once the cups are finished, I like to go back through them and add even more decor to the cups as needed! The more, the better!
Step Four: Bagging and Tagging
Lastly, so that the cups are easy to throw during our parade, we bag them up in these large cellophane bags and add a cute gift tag. I used Canva to make my tags. You can download my design and edit to make your own!
That’s it! They’re definitely time consuming to make, but they make for such a fun collectible item to throw to parade goers! Lots of people collect the signature throws from the parades and use them as decor in their homes for Mardi Gras each carnival season!
Questions? Comments?! Leave your thoughts below, and I’ll get back to you!